
There’s a memory that still makes me cringe a little. It was years ago, after a long week of recipe testing, and all I wanted was a bowl of pure comfort. I’d seen a picture of a Tuscan-style chicken pasta, and I became obsessed. I spent over an hour and dirtied three different pans trying to replicate it, only to end up with a watery, bland sauce and chicken that was sadly overcooked. The flavor just wasn’t there. It was a restaurant imposter, and a bad one at that.
I knew there had to be a better way. A real-world way. A method that delivered that truly decadent, rich, sun-drenched flavor of a Tuscan kitchen without the chaos and cleanup.
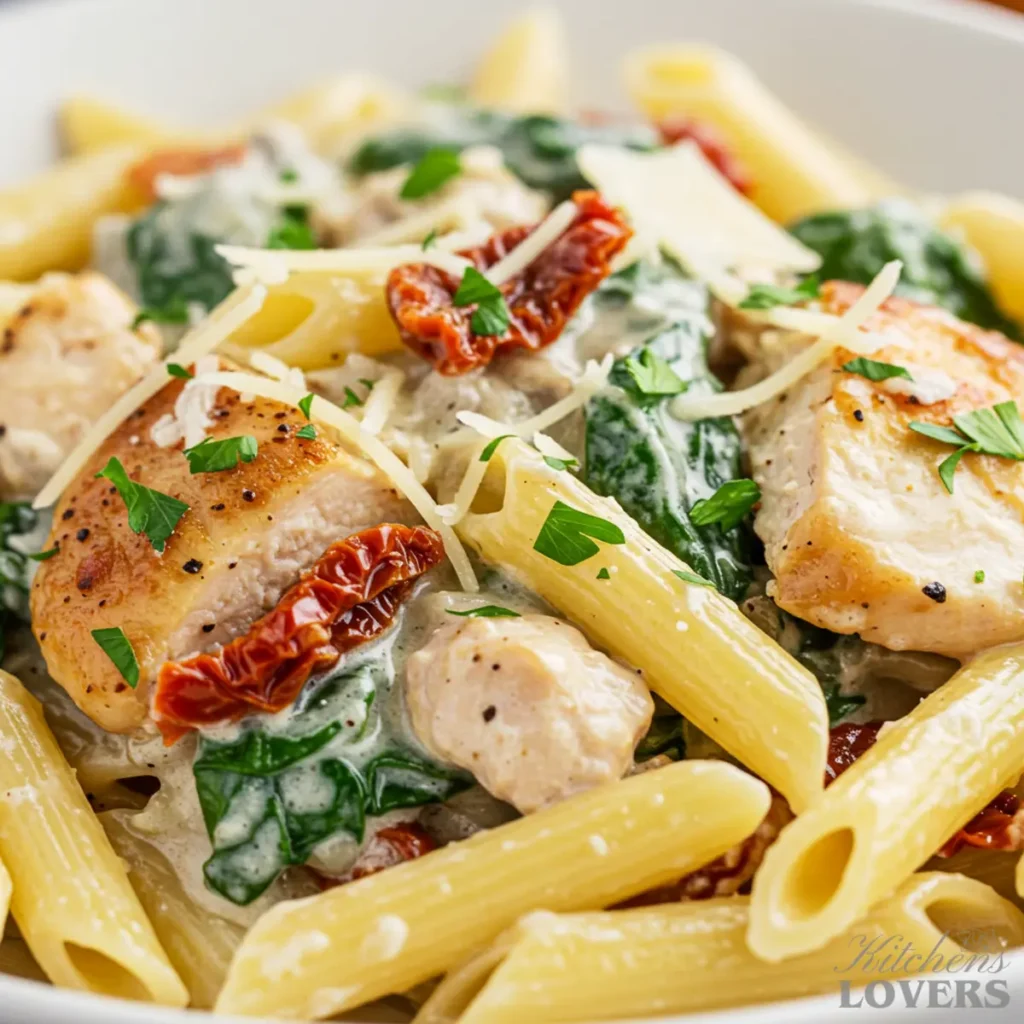
After dozens of tests—and I mean dozens; my family thought we were moving to Tuscany—I finally cracked the code. This is that recipe. It’s the one I make when I need a guaranteed win. It’s built around a single pan, which forces the flavors to concentrate and build on each other, creating a sauce that’s unapologetically rich and luxurious. This isn’t a ‘light’ version; this is the real deal. And it’s ready in about 30 minutes.
Welcome to the last Tuscan Chicken Pasta recipe you’ll ever need.
Why This Recipe Is the Only One You Need:
- True One-Pan Method: Unlike other recipes that have you juggling pots and pans, our entire dish, from searing the chicken to finishing the sauce, is made in one skillet. This means less cleanup and a sauce that captures every last bit of flavor.
- Unapologetically Rich Cream Sauce: We don’t skimp. While some recipes use milk or other substitutes that result in a bland sauce, we build a from-scratch cream sauce that’s full-bodied, velvety, and worthy of a five-star restaurant.
- Maximum Flavor, Minimum Fuss: By blooming the sun-dried tomatoes and garlic in the chicken drippings, we create a powerhouse flavor base that other recipes simply miss. It’s a small step that makes a world of difference.
The Building Blocks of Tuscan Flavor
The magic of this dish is how it transforms a handful of good, honest ingredients into something truly special. We’re not using anything you can’t find at a standard grocery store, but we are going to use them in a way that maximizes their potential. Quality matters here, but accessibility is key.
- 1 lb Boneless, Skinless Chicken Breasts: Pounded to an even ½-inch thickness.
- 8 oz Penne Pasta: Or another short, sturdy pasta shape.
- 1 ½ cups Heavy Cream: This is the non-negotiable secret to a truly luscious, restaurant-quality sauce.
- ½ cup Sun-Dried Tomatoes in Oil: Roughly chopped, plus 1 tablespoon of the oil from the jar.
- 5 oz Fresh Spinach: About 5 big handfuls; it looks like a lot but wilts down to almost nothing.
- 1 small yellow onion: finely chopped.
- 4-6 cloves Garlic: Minced. Don’t be shy here.
- 1 cup low-sodium chicken broth: to control the salt level.
- 2 tbsp all-purpose flour: just enough to create a velvety, thick sauce.
- ¾ cup Freshly Grated Parmesan Cheese: Plus more for serving. Please, use a block!
- 1 tbsp Olive Oil
- 1 tsp Italian seasoning
- ¼ tsp red pepper flakes: or more, if you like a little heat.
- Salt and Freshly Cracked Black Pepper: To taste.
The Best Chicken to Use
For this recipe, I stand by using boneless, skinless chicken breasts, but with one critical step: you must pound them to an even ½-inch thickness. You can do this with a meat mallet or even a rolling pin between two sheets of plastic wrap. Why? Because it’s the single best way to guarantee your chicken cooks evenly and stays juicy. No more sad, dry edges with an undercooked center. It also allows for a faster, harder sear, which means more of those delicious browned bits (the fond) left in the pan—the very foundation of our one-pan sauce. Chicken thighs will also work wonderfully if you prefer dark meat; they’ll just need a few extra minutes to cook through.
Why Sun-Dried Tomatoes Are the Star
Forget those dry, sad-looking tomatoes in a bag. The star of this show—the ingredient that truly screams “Tuscan”—is oil-packed sun-dried tomatoes. These aren’t just for color; they are a concentrated bomb of sweet, tangy, umami flavor that infuses the entire dish. And the best part? We’re going to use a tablespoon of that intensely flavorful oil they’re packed in to cook our aromatics. It’s a trick that layers in flavor from the very start, giving our sauce a depth that you just can’t get any other way.
Smart Swaps & Substitutions
| Ingredient | Best Substitution | Notes |
| Heavy Cream | Half-and-half | The sauce won’t be quite as rich, but it works in a pinch. Avoid milk, which can curdle and will result in a watery sauce. |
| Fresh Spinach | Chopped Kale | If using kale, be sure to remove the tough stems and add it a few minutes earlier as it needs more time to soften. |
| Penne Pasta | Rigatoni, Fusilli, Bow Ties | Any short pasta with plenty of nooks and crannies to hold the sauce will be great. |
| Yellow Onion | 1 large Shallot | Shallots provide a slightly milder, more delicate flavor that is also wonderful here. |
| Chicken Broth | Dry White Wine or Vegetable Broth | To substitute with wine (like a Pinot Grigio), use ½ cup and let it cook off for a minute before adding the cream. If using vegetable broth, simply swap it 1-for-1. |
The Secret Weapon for a True One-Pan Meal
The magic of this recipe, and the very foundation of our promise, is that everything—from searing the chicken to cooking the pasta and building that incredible cream sauce—happens in a single pan. No extra pot for boiling pasta, no colander to wash. This is about pure efficiency and flavor. But to do it right, you need one specific tool.
The One-Pan Workhorse: A Large, Deep Skillet or Dutch Oven
The undisputed hero of this recipe is a large, heavy-bottomed skillet (I use my 12-inch cast iron) or a 5-quart Dutch oven. This is the only piece of cooking equipment that matters, and it’s non-negotiable for two key reasons:
- Superior Searing: A heavy pan, like cast iron or quality stainless steel, gets incredibly hot and stays hot. This is how you achieve that perfect, deep golden-brown crust on the chicken. That crust leaves behind flavorful browned bits in the pan (it’s called fond), which form the very soul of our sauce. A flimsy, thin pan will steam your chicken and cheat you out of this flavor.
- Capacity for the Magic: This pan must be large and deep enough to hold all the liquid and the uncooked pasta. As the pasta boils directly in the sauce, it will release its starches, which is our secret trick for naturally thickening the sauce to a gloriously creamy, velvety texture without adding a ton of extra flour.
Give your ingredients room to work their magic in the right pan, and you’ll be rewarded with a mind-blowingly simple cleanup and a deeply flavorful meal.
Other Tools You’ll Need
- Meat Mallet or Rolling Pin: For pounding the chicken to an even thickness. This is a crucial step for juicy results.
- Whisk: Essential for ensuring your cream sauce is perfectly smooth and incorporated.
- Box Grater: The only way to grate Parmesan. The pre-shredded kind contains additives that will ruin the texture of your beautiful sauce.
- Sharp Knife & Cutting Board: For prepping your onion, garlic, and sun-dried tomatoes.
Expert Tips for Flawless, Restaurant-Quality Results
Over the 30 years I’ve spent in kitchens, I’ve learned that the difference between a pretty good dish and a truly unforgettable one comes down to a few key techniques. These aren’t complicated, but they are non-negotiable for achieving that deep, layered flavor we’re after. This is what will make your version of this dish stand head and shoulders above the rest.
How to Choose and Prepare Sun-Dried Tomatoes
This is, without question, one of the most important choices you’ll make for this recipe. You have two options at the store: oil-packed or dry-packed.
For this sauce, you want the oil-packed sun-dried tomatoes. The reason is simple: the oil in that jar is liquid gold. Those tomatoes have been bathing in seasoned olive oil, infusing it with an intense, sweet-tart, umami flavor that we are going to use to build our sauce. Before you chop your tomatoes, drain them but reserve a tablespoon of that oil. Sautéing your onions and garlic in that tomato-infused oil is my secret weapon for layering flavor right from the start.
But what if you can only find the dry-packed kind in a bag? You can absolutely use them, but you have to rehydrate them first. Simply cover them in a bowl with hot chicken broth or water for about 30 minutes until they’re pliable. Drain them (discard the soaking liquid), pat them dry, and proceed. Just know you’ll be missing that bonus layer of flavor from the infused oil, so you might want to add an extra pinch of Italian seasoning to compensate.
Why Freshly Grated Parmesan Is Non-Negotiable
I am going to be firm here, because this is the single biggest mistake I see home cooks make. Do not use pre-shredded, bagged Parmesan cheese. Ever. It is the fastest way to ruin your beautiful cream sauce.
Here’s why: those little pre-shredded strands are coated with anti-caking agents like potato starch or even cellulose (wood pulp!) to keep them from clumping in the bag. Those same agents will prevent the cheese from melting properly into your sauce. Instead of a silky, smooth, perfectly emulsified sauce, you will get a grainy, clumpy, and disappointing texture.
Buy a block of real Parmigiano-Reggiano. It’s not just about flavor; it’s about chemistry. Grate it yourself just before you use it (a box grater or Microplane is perfect). It will melt like a dream into the hot liquid, creating the velvety sauce of your dreams. Trust me on this—it is worth the extra 60 seconds of effort.
Don’t Crowd the Pan: The Secret to a Perfect Sear
When you first add your seasoned, pounded-thin chicken breasts to the hot pan, you need to hear a confident sizzle. If you don’t, your pan isn’t hot enough. But just as important is giving each piece of chicken its own space. Don’t let them touch. If you crowd the pan, the chicken will steam in its own juices rather than searing. A crowded pan is a steamy pan.
The goal is to get a deep, golden-brown crust. That crust is called fond, and it’s where the soul of the sauce comes from. If your skillet isn’t big enough to sear all the chicken at once with space around each piece, simply do it in two batches. It’s a small step that makes a monumental difference in the final flavor of the dish.
Step-by-Step Guide to Creamy Tuscan Chicken Pasta
Follow these steps exactly, and I promise you a result that tastes like it came from a high-end Italian restaurant, all from one pan on your stove. The kitchen is about to start smelling incredible. Let’s begin.
Time Needed: 30 minutes.
Phase 1: Searing the Chicken & Building the Flavor Base
1. Prepare and Sear the Chicken:
First, pound your chicken breasts between two sheets of parchment paper until they are an even ½-inch thick. This is the secret to juicy, evenly cooked chicken. Season both sides generously with salt, pepper, and the Italian seasoning. Now, heat the olive oil in your large, heavy-bottomed skillet over medium-high heat. Once the oil shimmers, carefully place the chicken in the pan, making sure not to crowd them (work in batches if you must!). Sear for 4-5 minutes per side until a deep golden-brown crust forms. The only way to know for sure that it’s cooked through is to check the internal temperature, which should be 165°F (74°C). Using a meat thermometer is the most reliable way to ensure your chicken is both safe and juicy.
Don’t worry about those browned bits sticking to the bottom of the pan—that’s pure flavor! Transfer the cooked chicken to a cutting board and let it rest.
2. Sauté the Aromatics: Reduce the heat to medium. Add the tablespoon of reserved oil from the sun-dried tomato jar right into the same skillet. Add your finely chopped onion and cook, stirring occasionally, for about 3-4 minutes until it softens and becomes translucent. Now, add the minced garlic and the red pepper flakes. Sizzle everything for just another 60 seconds until that nutty, irresistible garlic aroma hits you. Be careful not to let it burn.
Phase 2: Creating the One-Pan Cream Sauce
3. Build the Sauce Foundation: Sprinkle the all-purpose flour over the onions and garlic and immediately start whisking. Continue to cook for one minute, whisking constantly. This little step cooks off the raw flour taste and will create a beautifully thick sauce later.
4. Deglaze and Simmer: While still whisking, slowly pour in the chicken broth. Use your whisk or a wooden spoon to scrape up all those prized browned bits from the bottom of the skillet. They will dissolve into the broth, creating the soul of your sauce. Now, stir in the heavy cream and the chopped sun-dried tomatoes. Bring the sauce to a gentle, bubbling simmer.
Phase 3: Cooking the Pasta & Finishing the Dish
5. Cook the Pasta in the Sauce: Once the sauce is simmering, pour the uncooked penne directly into the skillet. Stir everything together until the pasta is fully coated and mostly submerged in the liquid. Let it cook at a steady simmer, stirring every couple of minutes to prevent any pasta from sticking to the bottom of the pan. Cook for about 12-15 minutes, or until the pasta is tender (al dente) and the sauce has thickened beautifully from the pasta’s starches. Pro Tip: If your sauce gets too thick before the pasta is perfectly al dente, splash in a little more chicken broth or warm water to loosen it to your desired consistency.
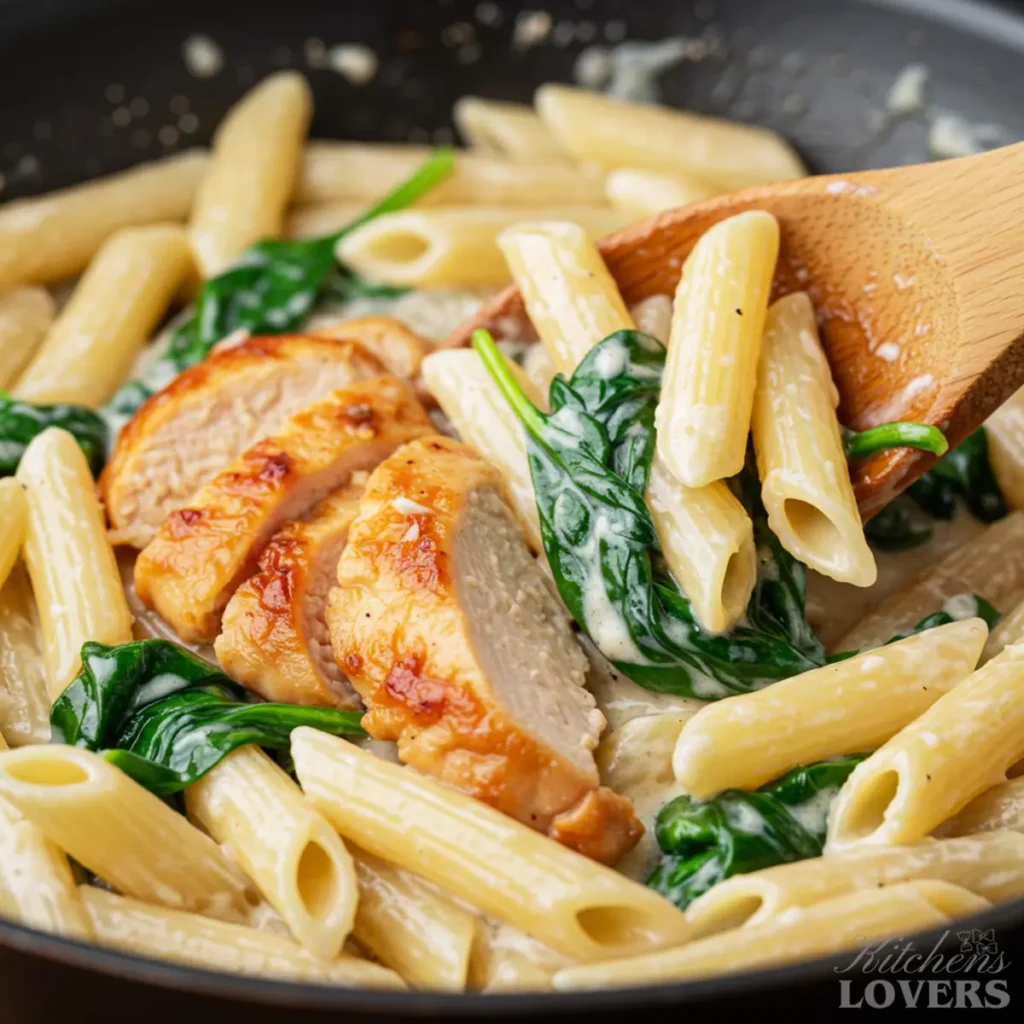
6. Finish with Spinach and Parmesan: Turn the heat down to low. Grab your fresh spinach and stir it into the pasta and sauce, a handful at a time. It will look like a mountain, but it will wilt down completely in about 1-2 minutes. Now, remove the skillet from the heat entirely. This is important to prevent the cheese from clumping. Sprinkle in the freshly grated Parmesan and stir until the sauce is glossy, creamy, and coats every single piece of pasta. Season with more salt and pepper to your liking.
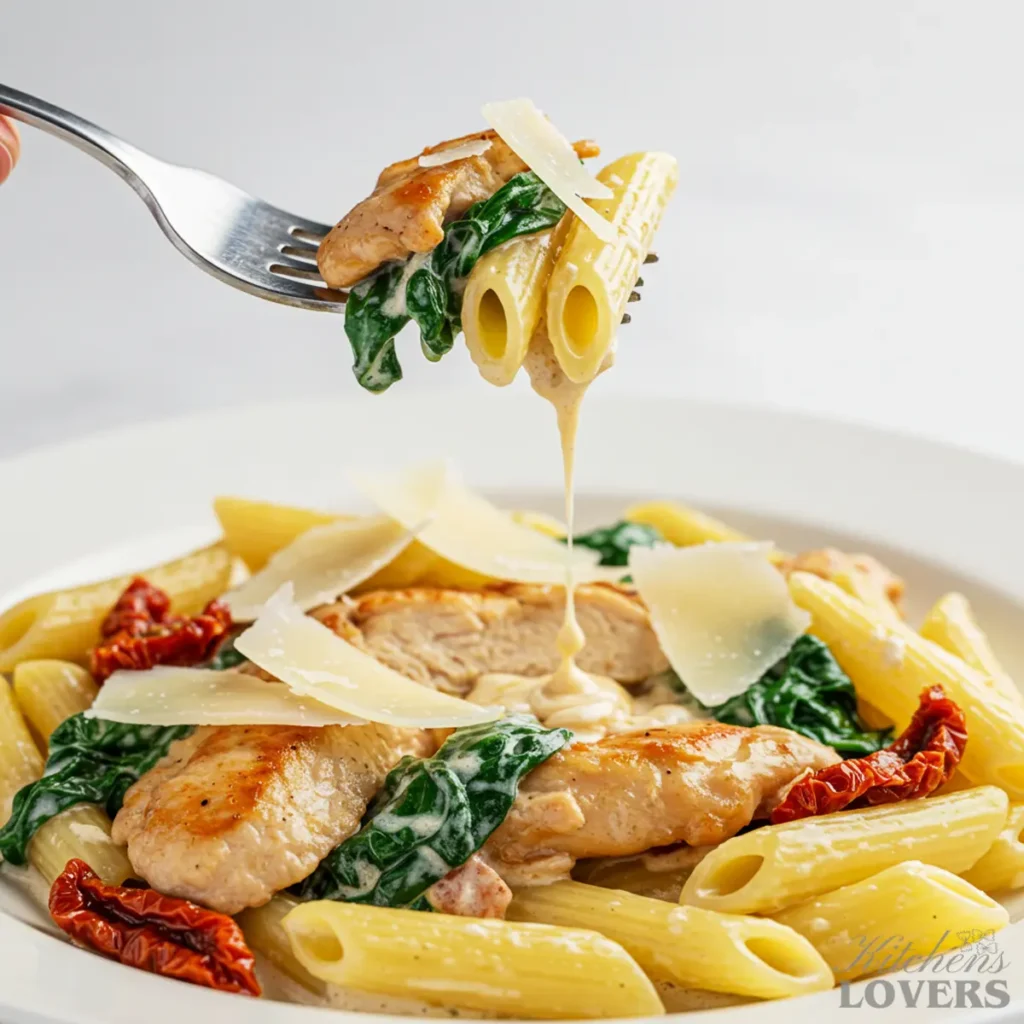
7. Slice and Serve: Slice the rested chicken against the grain. You can either return the slices to the pan and toss gently, or you can plate the pasta and arrange the chicken slices on top. Be sure to pour any juices from the cutting board right back into the sauce—that’s flavor! Garnish with a little extra Parmesan and serve immediately. You did it.
Pro Variations & Creative Cooking Methods
I consider this core recipe your new weeknight secret weapon, but it’s also a fantastic starting point for customization. Once you’ve mastered the one-pan method, you can start playing with the flavors or even change the cooking method entirely to fit your schedule. Here are a couple of my family’s favorite tested-and-approved variations.
The ‘Set It and Forget It’ Slow Cooker Method
This is for those days when you want to walk into a house that already smells like dinner is almost ready. The slow cooker builds the sauce’s flavor beautifully over several hours. The pasta gets added at the end to ensure it’s perfectly al dente, not mushy.
- Season and Sear (Optional but Recommended!) : For the best flavor, season your chicken as directed and give it a quick sear in a hot, oiled skillet for 2-3 minutes per side. It doesn’t need to be cooked through. Then, place the seared chicken at the bottom of your slow cooker. If you’re in a huge hurry, you can skip searing and just put the raw chicken in.
- Add Sauce. Ingredients: On top of the chicken, add the chopped onion, minced garlic, chopped sun-dried tomatoes (with their oil), chicken broth, Italian seasoning, and red pepper flakes. Give it a gentle stir.
- Cook Low and Slow: Cover the slow cooker and cook on LOW for 4 hours or on HIGH for 2.5-3 hours.
- Cook the Pasta & Finish the Sauce: About 30 minutes before you’re ready to serve, remove the chicken from the slow cooker and set it on a cutting board to slice or shred. Turn the slow cooker to HIGH. Stir in the heavy cream and the uncooked pasta. Put the lid back on and let the pasta cook directly in the sauce for about 20-30 minutes, or until it’s tender.
- Combine and Serve: Stir the cooked pasta and sauce well. Add the shredded chicken, freshly grated Parmesan, and the handfuls of spinach. Stir until the cheese is melted and the spinach has wilted completely. Serve immediately.
The Spicy ‘Tuscan Heat’ Variation
If you like your creamy pasta to have a bit of a kick that cuts through the richness, this one is for you. We’re swapping out the subtle warmth of red pepper flakes for the more robust and fruity heat of Calabrian chili paste.
- The Swap: Find a jar of Calabrian chili paste or chopped Calabrian chilis in oil (it’s usually in the Italian section of the grocery store). Omit the red pepper flakes from the recipe.
- The Method: When you sauté the garlic in Step 2 of the main recipe, add 1 to 2 teaspoons of the Calabrian chili paste. Sizzle it for about 30 seconds with the garlic to wake up its flavor before you add the flour.
- Taste and Adjust: After you’ve added the Parmesan at the end, taste the sauce. If you want more heat, you can stir in another small spoonful of the chili paste. It adds a beautiful complexity and warmth that works wonderfully with the cream sauce.
Storing, Freezing & Reheating for Perfect Leftovers
Let’s be honest, creamy pasta dishes can be notoriously tricky to reheat. You often end up with a greasy, separated sauce and rubbery chicken. But I’ve developed a foolproof method to ensure your leftovers are nearly as decadent as the day you made them. It’s all about gentle heat and a little extra liquid.
Storing in the Refrigerator
Once the pasta has cooled completely to room temperature, transfer it to an airtight container. It will keep beautifully in the refrigerator for up to 3 days. The sauce will thicken and congeal significantly as it chills—don’t worry, that’s completely normal, and we will fix it perfectly during the reheat.
A Note on Freezing This Dish
I’m going to give it to you straight: I do not recommend freezing this dish. While technically you can, you will be disappointed with the results. The science of a cream sauce is a delicate thing. When frozen and thawed, heavy cream-based sauces have a very high tendency to “break” or separate, resulting in a grainy, watery, and often oily texture. The pasta also becomes mushy upon reheating. For the best experience, this is a dish to be enjoyed fresh or refrigerated for a few days.
The Absolute Best Way to Reheat Tuscan Chicken Pasta
Please, for the love of all things delicious, step away from the microwave. It is the enemy of leftover pasta. The intense, uneven heat will make your chicken tough, break the cream sauce, and turn it into an oily mess.
Instead, we’ll use the stovetop for a gentle approach that perfectly revives the sauce.
- Add to a Skillet: Place your desired portion of leftovers into a cold skillet or small saucepan.
- Add a Splash of Liquid: For each serving, add a splash (about 1-2 tablespoons) of chicken broth, milk, or even just water. This extra liquid is the key. It gives the cold, congealed sauce the moisture it needs to loosen up and become creamy again.
- Heat Gently: Turn the heat on to medium-low. The goal here is to warm it slowly. As the pasta begins to warm, stir it frequently, helping the sauce melt and re-emulsify with the added liquid.
- Serve When Hot: After about 5-7 minutes of gentle stirring, the sauce will be velvety smooth and the pasta will be heated through. It will taste almost as good as it did on day one.
The science is simple: the slow, even heat gives the fats and proteins in the cream time to recombine smoothly, while the extra liquid prevents the sauce from becoming too thick or oily. It’s a few extra minutes that are absolutely worth it.
What to Serve With Your Tuscan Chicken Pasta
This dish is a complete, satisfying meal all on its own, but if you want to turn it into a true feast, the right side dish can make all the difference. The strategy here is balance and contrast. Since the pasta is unapologetically rich and creamy, we want to pair it with sides that bring a touch of elegance and a clean, palate-cleansing brightness.
Shaved Fennel & Orange Salad
This is an incredibly refreshing and authentically Italian choice that looks and tastes far more complex than it is. The crisp, slightly licorice-like flavor of the raw fennel is a perfect, bright counterpoint to the creamy sauce. The sweetness from the orange segments cuts through the richness beautifully, creating a perfect bite every time.
- How to Make It: Thinly shave one fennel bulb (a mandoline is great for this). Toss with the segments from one orange, a drizzle of high-quality olive oil, a squeeze of lemon juice, and a sprinkle of flaky sea salt. Add a few leaves of fresh mint if you have them.
Sautéed Broccoli Rabe (Rapini) with Chili & Garlic
If you want a cooked green that offers a more assertive, rustic flavor, broccoli rabe is the answer. It has a pleasant, slightly bitter edge that stands up to and cuts through the rich Parmesan cream sauce in a way that milder greens just can’t. This is a classic Italian way to serve vegetables.
- How to Make It: Briefly blanch the broccoli rabe in boiling salted water for 1-2 minutes to tame some of the bitterness. Drain well. Heat a glug of olive oil in a skillet, add a few slices of garlic and a pinch of chili flakes, then sauté the blanched broccoli rabe for 3-5 minutes until tender.
Simple Marinated Cannellini Beans
For a truly rustic, Tuscan-style side dish, look no further than a simple bowl of marinated white beans. They offer a wonderfully creamy texture that complements the pasta, but their flavor is clean, simple, and herb-forward. Best of all, they can be served at room temperature, making them incredibly easy to prepare ahead of time.
- How to Make It: Drain and rinse a can of cannellini beans. In a bowl, toss them with a generous drizzle of your best extra virgin olive oil, the juice of half a lemon, a spoonful of chopped fresh parsley, a clove of minced garlic, and a pinch of salt and pepper. Let them marinate for at least 15 minutes.
For more inspiration on building the perfect menu, check out our complete collection of Crave-worthy chicken pasta dinners.
Frequently Asked Questions (Recipe FAQs)
I’ve made this dish dozens, if not hundreds, of times, and I’ve heard every question in the book. Here are the answers to the most common ones. Reading this first will guarantee a flawless result.
Make-Ahead & Lighter Options
This recipe is at its absolute best when served fresh, as the cream sauce is most luscious right after it’s made. However, you can do some strategic prep to make assembly a breeze for a busy weeknight. I often chop my onion, mince the garlic, and pound the chicken hours ahead of time. Store them in separate containers in the fridge. With that prep done, the active cooking time is only about 20 minutes. If you need to make the entire dish ahead, your best bet is to follow the reheating instructions in Part 8 to the letter.
This dish is intended to be rich and decadent, but I understand that sometimes you need a lighter option. You can substitute the heavy cream with half-and-half, but you must be careful when simmering, as it has a higher chance of curdling than heavy cream does. Do not use milk. It will result in a thin, watery sauce. To compensate for the flavor loss, I’d suggest boosting the other powerhouse ingredients: be more generous with the garlic and sun-dried tomatoes, and finish the sauce with a big squeeze of fresh lemon juice at the very end to add a brightness that helps mimic the satisfying richness of the full-fat version.
Sauce Troubleshooting
This is the most common fear with a cream sauce, and it almost always comes down to one of two things: heat or fat.
Your heat was too high. Cream sauces are an emulsion. If you let your sauce come to a rolling boil, especially after the cheese has been added, the heat will break that emulsion, forcing the dairy fats to separate from the proteins. The result is an oily, greasy mess. The key is a gentle simmer, and always remove the pan from the heat before you stir in the Parmesan cheese.
You used a low-fat dairy. Heavy cream is king for a reason—its high fat content makes it incredibly stable. If you try to use milk or even some brands of half-and-half, they lack the fat needed to stay emulsified and will curdle or break far more easily under heat.
Absolutely! Using boneless, skinless chicken thighs is a fantastic substitution. They have a higher fat content, which makes them incredibly flavorful and even more forgiving—they are very difficult to overcook. You won’t need to pound them; just trim any excess fat. Simply sear them for 5-6 minutes per side, or until they’re cooked through. The extra chicken fat rendered into the pan will only add more depth to your final sauce.
Storage & Freezing
This is one I feel very strongly about: please do not freeze this dish. I cannot in good conscience recommend it. Cream-based sauces are notoriously unstable in the freezer. Upon thawing and reheating, the sauce will almost certainly break and become grainy or oily. Furthermore, the pasta will absorb too much water and turn unpleasantly soft and mushy. This dish is designed for maximum enjoyment right now, or refrigerated for up to 3 days. Trust me, it’s worth making fresh.
From My Kitchen to Yours
This Creamy Tuscan Chicken Pasta is one of my proudest creations because it proves that you can have a truly restaurant-worthy dinner on the table in about 30 minutes, all in one pan. Now, I’d love to hear how it turned out for you!

Did you add your own twist? Did your family rave about the sauce? Drop a comment below, and please don’t forget to leave a star rating! It helps other readers find this recipe and tells me what you want to see more of.
More Creamy Chicken Pastas You’ll Love
If you loved the easy, impressive nature of this dish, I have a feeling you’ll fall for these two as well. They are cornerstone recipes here at KitchensLovers for a reason.
- Marry Me Chicken Pasta: If you think this sauce is good, wait until you try its even richer, more savory cousin. It’s another one-pan wonder that’s perfect for a special occasion.
- Creamy Lemon Chicken Pasta: When you’re craving something just as comforting but with a bright, zesty twist, this is the recipe you need. It’s sunshine in a bowl.
Want my very best tested-and-perfected recipes sent straight to your inbox? Join the KitchensLovers community. You’ll get my best work—no fluff, just foolproof dinners.
About the Author
Kate Thompson created KitchensLovers.com to simplify dinner for real-life families. She develops easy, flavor-packed chicken pasta recipes tested dozens of times to guarantee results. Her motto: “Easy Pasta, Every Time.”
This recipe was last tested and updated in August 2025 to ensure perfect results.
Creamy Tuscan Chicken Pasta Recipe
Equipment
- Large, Deep Skillet or Dutch Oven (12-inch)
- Meat Mallet or Rolling Pin
- Whisk
- Box Grater
- Sharp Knife & Cutting Board
Ingredients
Chicken & Pasta
- 1 lb Boneless Skinless Chicken Breasts, pounded to an even ½-inch thickness
- 8 oz Penne Pasta
Sauce & Aromatics
- 1.5 cups Heavy Cream
- 0.5 cup Sun-Dried Tomatoes in Oil chopped, plus 1 tbsp oil reserved
- 5 oz Fresh Spinach
- 1 small Yellow Onion finely chopped
- 4-6 cloves Garlic minced
- 1 cup Low-Sodium Chicken Broth
- 0.75 cup Freshly Grated Parmesan Cheese plus more for serving
- 2 tbsp All-Purpose Flour
- 1 tbsp Olive Oil
- 1 tsp Italian Seasoning
- 0.25 tsp Red Pepper Flakes
- Salt and Freshly Cracked Black Pepper to taste
Instructions
Phase 1: Searing the Chicken & Building the Flavor Base
- Pound the chicken breasts to an even ½-inch thickness and season both sides generously with salt, pepper, and Italian seasoning. Heat olive oil in a large, heavy-bottomed skillet over medium-high heat. Sear the chicken for 4-5 minutes per side until a deep golden-brown crust forms. For perfect results, ensure the chicken reaches a safe internal temperature of 165°F (74°C). Transfer cooked chicken to a cutting board to rest.
- Reduce heat to medium. Add 1 tbsp of reserved oil from the sun-dried tomato jar. Add the chopped onion and cook for 3-4 minutes until softened. Add the minced garlic and red pepper flakes and sizzle for 60 seconds until fragrant.
Phase 2: Creating the One-Pan Cream Sauce
- Sprinkle the all-purpose flour over the aromatics and whisk constantly for one minute to cook off the raw flour taste.
- While whisking, slowly pour in the chicken broth, scraping up all the browned bits from the bottom of the skillet. Stir in the heavy cream and chopped sun-dried tomatoes. Bring to a gentle, bubbling simmer.
Phase 3: Cooking the Pasta & Finishing the Dish
- Pour the uncooked penne directly into the simmering sauce, stirring to coat. Cook for 12-15 minutes, stirring occasionally, until pasta is al dente and the sauce has thickened. Pro Tip: If your sauce gets too thick before the pasta is done, splash in a little more chicken broth or warm water to loosen it.
- Turn heat to low. Stir in the fresh spinach, a handful at a time, until it wilts completely. Remove the skillet from the heat, then sprinkle in the freshly grated Parmesan. Stir until the sauce is glossy and creamy. Season with additional salt and pepper to taste.
- Slice the rested chicken against the grain. Serve the pasta topped with the chicken slices. Pour any juices from the cutting board back into the sauce. Garnish with extra Parmesan.
Notes
- How to Choose and Prepare Sun-Dried Tomatoes
- Why Freshly Grated Parmesan is Non-Negotiable
- Don’t Crowd the Pan
