
Let’s be honest—when you’re trying to get a family dinner on the table, the last thing you need is a recipe that fails. I’ll never forget the stress of trying to make a creamy lemon pasta on a busy Tuesday night, only to have the sauce break into a grainy mess just as the kids started asking how much longer it would be.
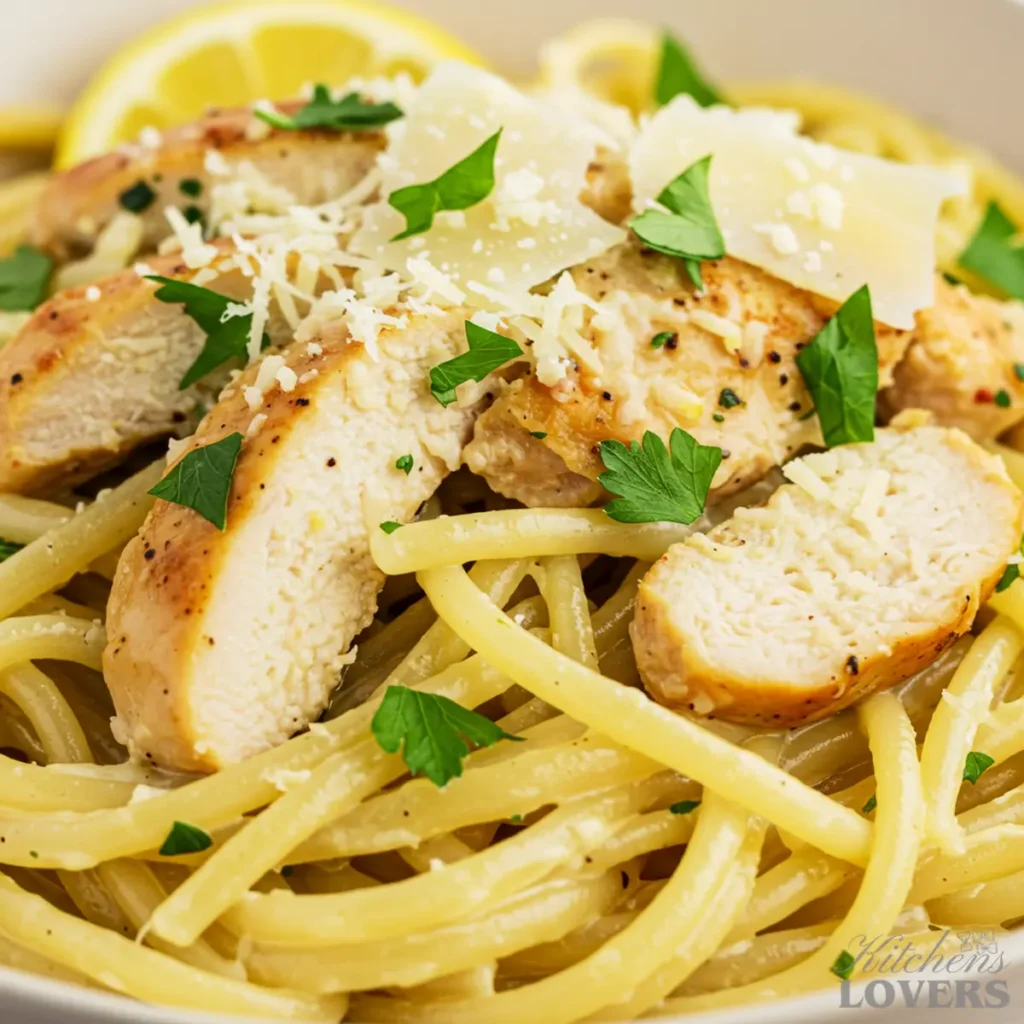
That moment is why I became obsessed with creating a lemon chicken pasta recipe that wasn’t just delicious but was absolutely, positively foolproof. This is that recipe. It was tested and perfected in my own kitchen, and it’s now the one dish my family constantly asks for. It delivers all the elegance of a restaurant meal, and the entire heart of the dish—the chicken and the luscious sauce—comes together in a single pot, ready in about 30 minutes without any anxiety. It’s pure comfort in a skillet.
This isn’t just dinner; it’s your new secret weapon for conquering the weeknight.
Why This Recipe Is The Only One You’ll Ever Need:
- Simple One-Pot Method (No Fussy Roux Needed!): Forget dirtying extra pans or wrestling with flour and butter. Our streamlined method builds a rich, luscious sauce right in the same skillet you use for the chicken, making cleanup a breeze.
- A Foolproof Sauce That Won’t Curdle: We use a simple technique to stabilize the cream sauce, so you get a silky, glossy finish every single time. I even teach you how to fix it if things go wrong—a tip no one else seems to share.
- Perfectly Balanced, Vibrant Flavor: By using both lemon zest and juice at specific stages, we create a bright, zesty flavor that beautifully cuts through the richness of the cream without ever becoming sour. It’s a taste of sunshine.
Essential Equipment for One-Pot Success
You don’t need a kitchen full of fancy gadgets for this recipe. In fact, the beauty of this dish is its simplicity. But having the right foundational tool makes all the difference and is key to unlocking the magic of the one-pot method.
- A Large, Wide Pot or Dutch Oven: This is the absolute star of the show. You need a pan with enough surface area to sear the chicken properly and enough depth to eventually hold the pasta and the sauce. A 5-quart (or larger) Dutch oven or a heavy-bottomed straight-sided sauté pan is perfect. Why is this so crucial? Its heavy construction provides even, steady heat, which is essential for building the sauce and preventing hot spots that can scorch the garlic or break the cream. This single piece of cookware does all the heavy lifting, from searing to saucing, which is the secret to our effortless cleanup.
- Microplane Zester: To get that fine, fragrant lemon zest without any of the bitter white pith, a microplane is your best friend. It glides over the lemon, releasing all those incredible essential oils. It’s also what I use for grating the Parmesan cheese for that perfect, powdery texture that melts like a dream.
- Tongs: A good pair of tongs is like an extension of your hands in the kitchen. They’re essential for flipping the chicken and even better for swirling the pasta through the finished sauce, ensuring every single strand is coated in that luscious, creamy goodness.
- Basic Kitchen Tools: You’ll also want a good knife for your garlic, a cutting board, and a liquid measuring cup. That’s it.
Expert Answers for a Flawless Pasta
I’ve learned that a few key techniques can make all the difference. Think of this as your insurance policy against the most common pasta pitfalls. Here are the questions I get asked the most.
1. My biggest fear: How do I absolutely guarantee my cream sauce won’t curdle?
This is all about prevention, and it’s easy. First, always start with full-fat heavy cream, as its stability is your best defense. Second, temper your cream by never adding it ice-cold to a scorching pan; we add it after the broth has cooled things down slightly. Finally, the golden rule: add the fresh lemon juice at the very end, with the pan OFF the heat. Acid and heat are what cause curdling. By removing the heat from the equation, you guarantee a smooth, beautiful sauce.
2. Help! My sauce broke anyway! Is it ruined?
Don’t you dare throw it out! Here is my “magic” fix that works every time. Remove the pan from the heat. In a separate small bowl, add a few tablespoons of fresh heavy cream. Now, using a whisk, slowly add one tablespoon of the broken sauce into the fresh cream, whisking vigorously until it’s smooth. Repeat this, adding the broken sauce bit by bit, until you have a stable emulsion. Gently stir this repaired mixture back into the main pan. As a last-resort, brute-force fix, you can pour the broken sauce into a blender and blitz on low for 20 seconds to force it back together.
3. What do I do if my sauce is too thin or too thick?
This is the easiest fix of all!
- If your sauce is too thin: This is actually a good sign! It means it’s ready for the pasta. Add your al dente (slightly undercooked) pasta directly to the skillet and let it simmer in the sauce for 1-2 minutes. The pasta will release starches that thicken the sauce to a perfect, glossy consistency while absorbing incredible flavor.
- If your sauce is too thick: Simply stir in a splash of the hot, starchy water you reserved from boiling your pasta. It’s liquid gold! It will thin the sauce to your desired consistency without diluting the flavor one bit. Add a tablespoon at a time until it’s perfect.
The One-Pot Method: Step-by-Step Instructions
This is where the magic happens. We’re going to build layers of flavor right in a single pot, which means less work, less cleanup, and a much more flavorful dish. Put on some music, pour a glass of that wine, and let’s get cooking. While the pasta boils in a separate pot, the entire heart of the meal—the chicken, the aromatics, and the luscious sauce—all comes together in this single skillet.
Time Needed: 40 minutes.
Step 1: Cook the Pasta to a Perfect Al Dente
Bring a large pot of salted water to a rolling boil. Add your linguine or fettuccine and cook according to package directions, but pull it out 2 minutes earlier than the recommended time. It should be very firm and noticeably underdone. This is my most important tip! The pasta will finish cooking later, right in the sauce. Just before you drain it, scoop out and save about 1 cup of the starchy pasta water. You might need it later to adjust the sauce consistency.
Step 2: Sear the Chicken
While the pasta cooks, pat your chicken cutlets dry and season them generously on both sides with salt and pepper. Heat the olive oil and butter in your large Dutch oven or skillet over medium-high heat. Once the butter is melted and foaming, you know it’s ready. Lay the chicken in the pan in a single layer—don’t crowd it! You want to hear that satisfying, loud sizzle. Cook for about 3-4 minutes per side, until it’s a deep golden-brown and cooked through. It should smell absolutely divine. Remove the chicken from the pan and set it aside on a plate for now. Don’t wipe out the pan! Those browned bits on the bottom are pure gold.
Step 3: Build the Aromatic Base
Reduce the heat to medium-low. Add the minced garlic and lemon zest to the pan. Sizzle them for just 30-60 seconds, stirring constantly. You’re not trying to brown the garlic here, just toast it until that nutty, irresistible aroma starts to perfume your entire kitchen. As soon as you smell it, pour in the white wine to deglaze the pan. It will bubble up furiously—this is exactly what you want. Use a wooden spoon to scrape all those tasty browned bits from the bottom of the pan as the wine reduces by about half.
Step 4: Create the Creamy Sauce
Pour in the chicken broth and bring it to a gentle simmer. This cools the pan down just enough to safely add our cream. Now, stir in the heavy cream and the optional pinch of red pepper flakes. Let it bubble gently for 2-3 minutes, stirring occasionally, until the sauce thickens just slightly. You’ll watch it transform from a thin liquid into something that can beautifully coat the back of your spoon.
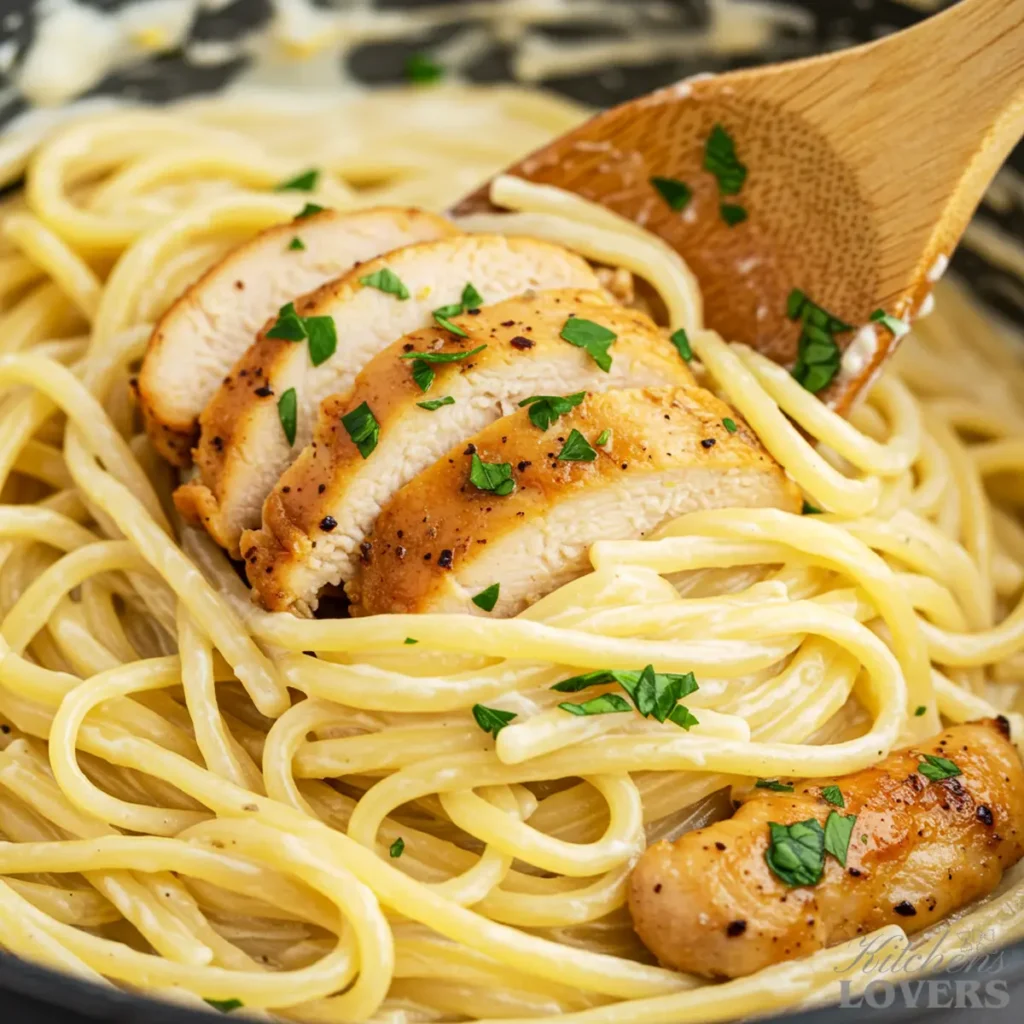
Step 5: Bring It All Together
Add the cooked, drained pasta and the seared chicken (along with any juices from the plate) back into the pot with the sauce. Use your tongs to toss everything together gently but thoroughly, allowing that undercooked pasta to soak up all the flavor from the sauce as it finishes cooking. This should take about 1-2 minutes. If the sauce looks too thick, add a splash of that reserved pasta water until it reaches a silky, luxurious consistency.
Step 6: The Finishing Touch (Off the Heat!)
This is the most important step for that foolproof finish. Turn the stove off completely. Take the pan off the burner. Now, add the freshly grated Parmesan cheese and toss continuously until the cheese melts into a smooth, glossy sauce. Finally, stir in the fresh lemon juice and chopped parsley. Taste it, and add more salt and pepper if you think it needs it.
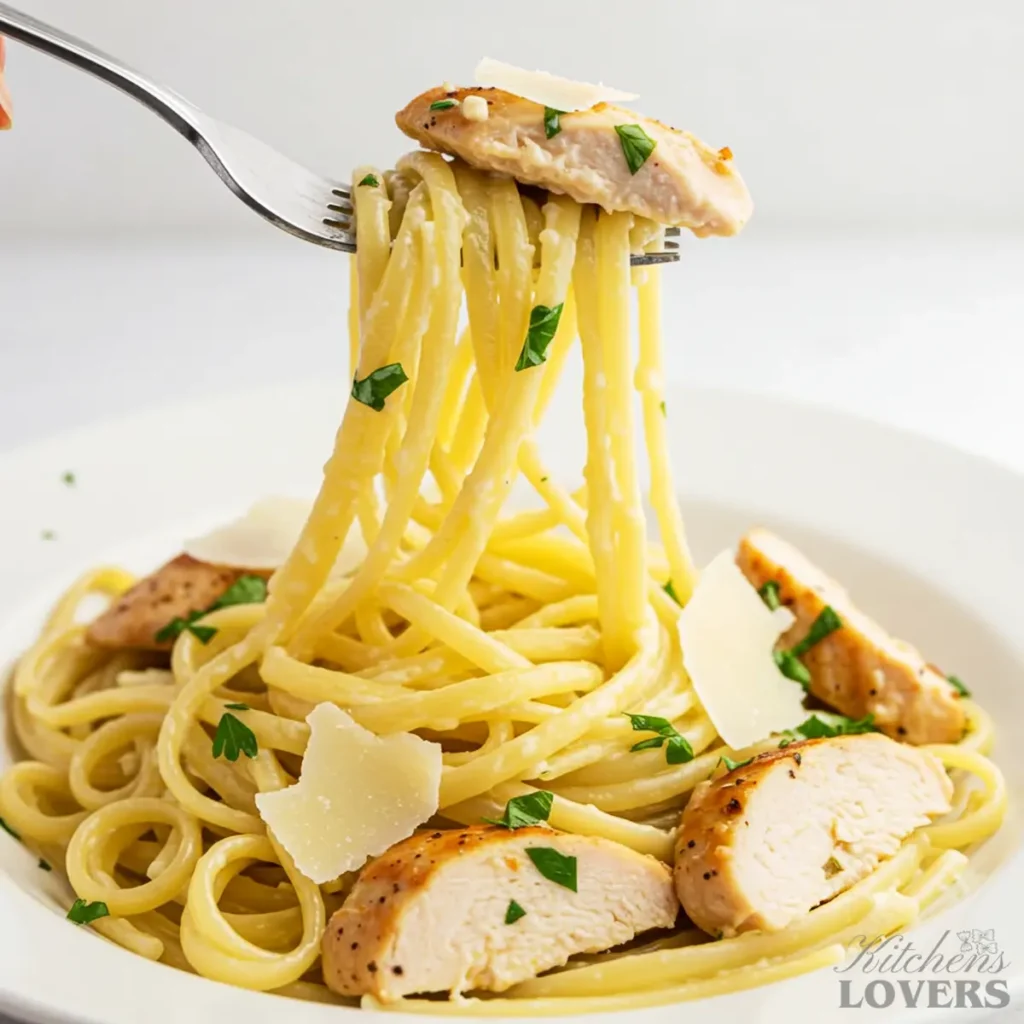
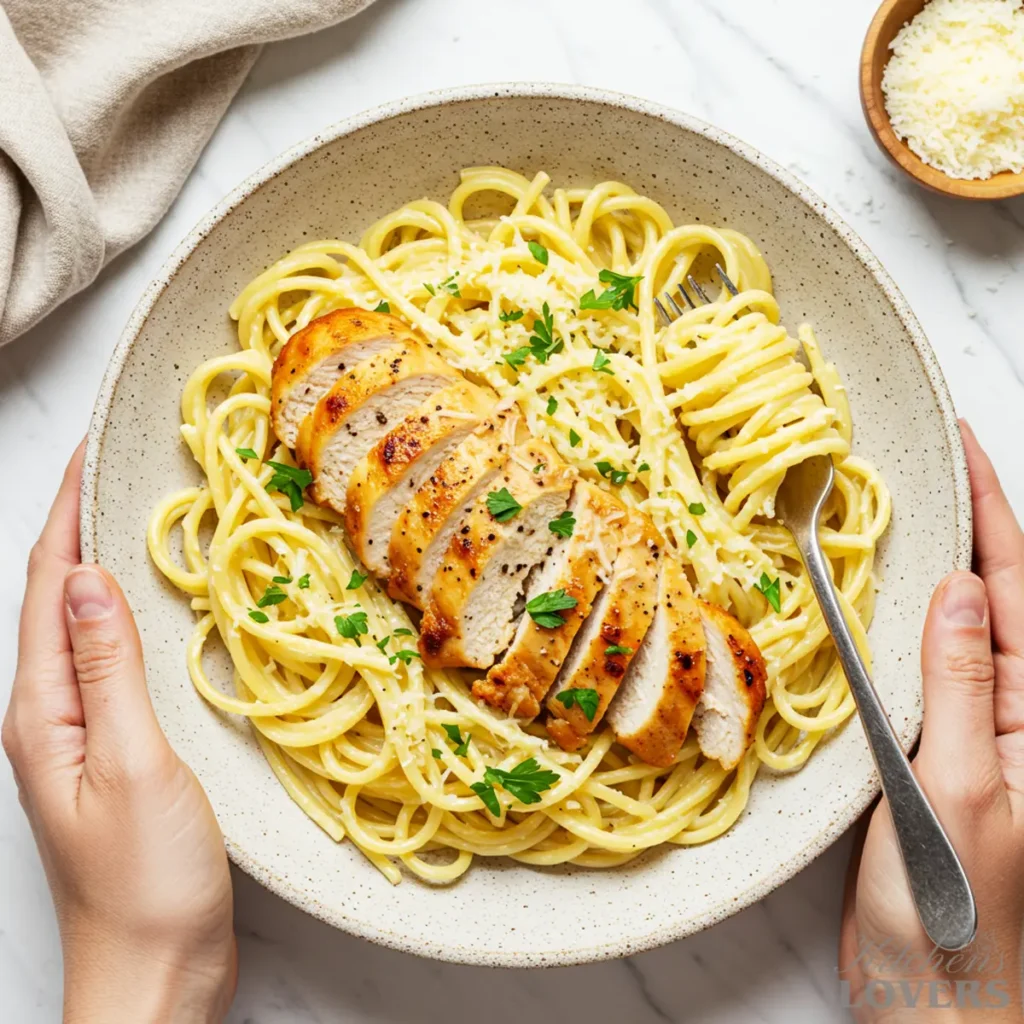
Serve immediately in warm bowls, with an extra grating of Parmesan cheese on top. Enjoy the applause.
Pro Variations to Customize Your Dish
A great recipe should also be a great blueprint. Once you’ve mastered the original, you can start making it your own. These are a couple of my family’s favorite kitchen-tested variations that add another layer of flavor and nutrition. The best part? They barely require any extra effort.
Variation 1: Bright & Peppery with Asparagus
The fresh, green, slightly peppery bite of asparagus is a natural match for the bright lemon and rich cream. It’s a fantastic way to turn this pasta into a true one-pot, veggie-packed meal.
- What You’ll Need: 1 bunch of fresh asparagus, with the tough woody ends snapped off. Cut the spears into 1-inch pieces.
- How to Do It: This is so simple. You’ll add the prepared asparagus pieces into the pan at Step 4, at the same time you pour in the chicken broth and heavy cream.
- The Result: As the sauce simmers and thickens, the asparagus will simultaneously cook to a perfect, vibrant green, crisp-tender texture. It requires no extra pan and no extra time. Just proceed with the rest of the recipe as written.
Variation 2: Earthy & Easy with Fresh Spinach
This is my personal favorite for how easy it is. Adding a few big handfuls of spinach at the very end gives the dish a beautiful color and a healthy, earthy note that beautifully balances the richness of the Parmesan.
- What You’ll Need: 5 ounces (one standard clamshell container) of fresh baby spinach.
- How to Do It: At the end of Step 5, right after you’ve tossed the pasta and chicken through the sauce, add all of the spinach to the pan. Use your tongs to gently fold and toss the spinach into the hot pasta and sauce.
- The Result: The residual heat of the sauce is all you need. Within about 60 seconds, the spinach will wilt down perfectly without becoming watery or mushy. Once it has wilted, immediately proceed to Step 6—turning off the heat and adding the cheese and lemon juice.
Variation 3: Savory & Spicy with Pancetta and Calabrian Chiles
This one is for when you’re craving something with a bit more depth and a sophisticated, warming heat. We add crispy pancetta for a salty bite and replace the standard red pepper flakes with a more complex chile paste.
- What You’ll Need: 4 oz of diced pancetta and 1-2 teaspoons of chopped Calabrian chiles in oil.
- How to Do It: Add the diced pancetta to your cold skillet and render it over medium heat until it is brown and crispy (about 5-6 minutes). Remove the pancetta with a slotted spoon, leaving the rendered fat in the pan. Sear your chicken in the delicious pancetta fat instead of the butter and olive oil. When you get to the aromatics in Step 3, add the Calabrian chiles along with the garlic. Finally, stir the crispy pancetta back into the pasta at the end when you add the cheese.
- The Result: A sauce with a deeper, savory foundation and a rich, fruity spice that builds with every bite, perfectly balanced by the crispy, salty pancetta.
Storing, Freezing & Reheating
There’s nothing better than knowing you have a delicious, restaurant-quality meal waiting for you in the fridge. But cream sauces can be tricky. Here is my definitive guide to storing and reheating this pasta so it tastes just as luscious as when you first made it.
Storing in the Refrigerator
Once the pasta has cooled completely to room temperature, transfer it to an airtight container. It will keep beautifully in the refrigerator for up to 3 days. The sauce will thicken considerably as it chills, which is perfectly normal.
A Note on Freezing: I Don’t Recommend It
I’m going to be honest with you—this is one dish that just doesn’t belong in the freezer. Cream- and Parmesan-based sauces have a delicate structure (an emulsion) that breaks when frozen and thawed. The result is often a grainy, separated, and watery sauce. For the best experience, this pasta is meant to be enjoyed fresh or within a few days from the fridge.
The Best Way to Reheat (The Secret is Low & Slow)
Your microwave is not your friend here. It heats too quickly and unevenly, which is the fastest way to break your beautiful sauce and make the chicken tough. The goal is to gently rewarm the dish, giving the sauce a chance to come back to its original silky state.
- Stovetop is Best: Place the desired amount of leftover pasta in a small saucepan or skillet.
- Add a Splash of Liquid: For a single serving, add a tablespoon or two of milk, chicken broth, or even a little extra heavy cream. This is the key. This extra liquid helps loosen the cold, thick sauce and ensures it reheats gently without separating.
- Use Low Heat: Warm the pasta over low heat, stirring frequently. Don’t be tempted to rush it with high heat. Within a few minutes, you’ll see the sauce transform back into its creamy, glorious, original texture. It will be ready as soon as it’s warmed through.
What to Serve With Creamy Lemon Chicken Pasta
This dish is a stunning, complete meal all on its own, but the right accompaniments can turn it from a great weeknight dinner into a truly memorable dining experience. The key is to choose sides that balance, rather than compete with, the richness of the pasta. Here are a few of my other go-to pairings that never fail.
Garlic-Roasted Broccolini:
The oven is your best friend here. Roasting broccolini (or broccoli florets) at a high heat brings out its nutty, slightly sweet flavors and gives the edges a delightful char. This gentle bitterness is the perfect counterpoint to the rich, creamy sauce. Just toss the broccolini with olive oil, a little minced garlic, salt, and pepper, and roast until tender-crisp. It adds a wonderful texture and a sophisticated, earthy element to the plate.
Simple Herbed Breadsticks:
While you absolutely need something to drag through that last bit of sauce, a simple breadstick can feel more elegant than a heavy slice of bread. Brush store-bought or homemade breadsticks with melted butter infused with a pinch of dried Italian herbs. They are light, crisp, and provide that satisfying crunch without overwhelming the main course.
A Refreshing Cucumber-Dill Salad:
For a different kind of crunch, a simple cucumber salad is phenomenal. Thinly slice cucumbers and toss them with a light dressing of plain yogurt or sour cream, a squeeze of lemon, and a ton of fresh dill. It’s cool, crisp, and incredibly refreshing. The dill complements the lemon beautifully, and the coolness of the cucumber is a welcome contrast to the warm, rich pasta.
Finding the perfect creamy pasta for your family is a true joy. If this recipe was a hit, then you absolutely must try another one of our family’s all-time favorites: my Creamy Artichoke Spinach Chicken Pasta. It has that same comforting, luscious feel and comes together just as easily!
Frequently Asked Questions (FAQs)
Here are the answers to a few more specific questions that might come up as you’re cooking. Think of this as the “what if” guide to making sure you nail it every time.
Balancing the Flavors Just Right
Don’t panic! It happens to the best of us. The key is to balance the acid. The best way to do this is by adding more richness. Stir in another splash of heavy cream or an extra tablespoon of butter. The fat will soften the sharp acidic flavor. You can also add another handful of grated Parmesan cheese. Taste after each addition. If it’s still too sharp, a tiny pinch of sugar can also work wonders to counteract the sourness.
Yes, and this is a fantastic way to elevate a jarred sauce! The principle is exactly the same and is the secret to success with any cream sauce: always add the fresh lemon juice off the heat, right at the end. Gently heat your Alfredo sauce, and just before serving, take the pot off the stove and then stir in the fresh juice. You’ll get all the bright flavor without any risk of the sauce breaking.
Why Lemon Makes All the Difference
This is my favorite part of the dish’s chemistry! Without acid, a rich cream sauce can feel heavy and one-dimensional. The lemon’s acidity acts like a spotlight—it cuts through the fat from the cream and cheese, cleansing your palate and making all the other flavors feel brighter and more vibrant. It’s the same reason a squeeze of lime on a rich taco works so well. It adds balance and makes the whole dish sing.
If simmering alone isn’t getting your sauce as thick as you’d like, the most reliable fix is a cornstarch slurry. But you must do it correctly! Whisk 1 teaspoon of cornstarch with 1 tablespoon of cold water until it’s a completely smooth, milky liquid. While the sauce is gently simmering, slowly whisk in the slurry. The sauce will thicken almost instantly. This works much better than just dumping cornstarch powder in, which would create lumps.
Tried it? Loved it? Let Me Know!
Your feedback is everything! It helps me know what you love and what you want to see more of. If you made this Creamy Lemon Chicken Pasta, I’d be so grateful if you would please leave a star rating and a comment below! I’d love to know how it turned out for your family. Did you try any variations? Did you discover a new trick? Share it with the rest of us!
Finding that perfect weeknight chicken pasta is a true victory. For those nights you’re craving a different kind of kick, I highly recommend trying my family’s favorite fiery recipe: the Blackened Chicken Pasta. And for our complete, curated collection of the best chicken pasta dishes you can make, be sure to explore our definitive page: Crave-Worthy & Restaurant-Style Recipes.
Get More Foolproof Recipes!
For more simple, flavor-packed pasta recipes guaranteed to make your weeknights easier, subscribe to our newsletter! You’ll get my best new dishes, pro tips, and menu ideas delivered straight to your inbox.
About Kate Thompson
Kate Thompson created KitchensLovers.com to simplify dinner for real-life families. She develops easy, flavor-packed chicken pasta recipes tested dozens of times to guarantee results. Her motto: ‘Easy Pasta, Every Time.’
The Science of a Perfect, Unbroken Lemon Cream Sauce
Have you ever wondered why a cream sauce breaks or curdles? The answer is simple food science. Understanding the “why” is the final step to truly mastering this recipe and banishing any fear of a grainy sauce forever. This isn’t about following rules blindly; it’s about understanding the delicious chemistry in your pan.
A cream sauce is a classic example of an emulsion—a delicate mixture of fat and water, two things that normally don’t like to stay mixed. In our sauce, the tiny fat globules from the heavy cream are suspended in the water-based liquids like chicken broth. It’s a fragile, beautiful balancing act.
The main challenge arrives with our star ingredient: the lemon. Lemon juice is an acid. Dairy, meanwhile, contains protein molecules called casein. When you introduce a strong acid to these casein proteins, especially under high heat, it causes them to denature and clump together, separating from the water. This is the very definition of curdling—the emulsion has “broken.” This reaction is especially aggressive in lower-fat dairy like milk or half-and-half, where there aren’t enough fat molecules to protect the proteins.
So, how do we build a scientifically sound, stable sauce?
We Choose the Right Foundation (High-Fat Cream):
The hero of our sauce is the high fat content in heavy cream. Think of those abundant fat globules as tiny bodyguards for the delicate proteins. They create a rich, dense structure that physically buffers the casein from the lemon’s acid, making it significantly harder for the acid to attack and curdle the proteins. This is why heavy cream is so resilient and your best defense against a broken sauce.
We Control the Temperature (Tempering):
Shocking dairy with a sudden, drastic change in temperature can also cause an emulsion to break. By adding our cream to the pan after the chicken broth has already brought the overall temperature down, we are essentially “tempering” it. This gradual introduction allows the cream to warm up gently, keeping its emulsion stable and happy.
We Add Acid at the Safest Moment (Off-Heat):
Heat acts as an accelerator for chemical reactions. Introducing acid to dairy over high heat is practically an invitation for curdling. By following our final, critical step—adding the fresh lemon juice off the heat—we remove that accelerator from the equation entirely. The stabilized sauce is warm enough to incorporate the juice’s flavor seamlessly but not hot enough to trigger the catastrophic curdling reaction.
By using these principles, you’re not just cooking—you’re being a food scientist. You’re intelligently building a stable emulsion that is scientifically engineered to be silky, luscious, and absolutely foolproof.
This recipe was last tested and updated in July 2025 to ensure perfect results.
Creamy Lemon Chicken Pasta Recipe
Equipment
- A Large, Wide Pot or Dutch Oven
- Microplane Zester
- Tongs
Ingredients
Pasta & Chicken
- 8 oz linguine or fettuccine
- 1 lb boneless skinless chicken breast, preferably thin-cut cutlets
- 2 tablespoons olive oil
- 1 tablespoon butter
Creamy Lemon Sauce
- 4 cloves garlic minced
- 1 large lemon for both zest and juice
- 1/2 cup dry white wine
- 1 cup low-sodium chicken broth
- 1 cup heavy cream
- 3/4 cup freshly grated Parmesan cheese
- 1 pinch red pepper flakes optional
For Finishing
- Salt and freshly cracked black pepper to taste
- 2 tablespoons fresh parsley chopped
Instructions
- Cook the Pasta: Bring a large pot of salted water to a rolling boil. Add pasta and cook for 2 minutes LESS than the package directs for al dente. Just before draining, reserve 1 cup of the starchy pasta water, then drain the pasta.
- Sear the Chicken: While pasta cooks, pat chicken dry and season generously with salt and pepper. Heat olive oil and butter in a large Dutch oven over medium-high heat. Add chicken in a single layer and cook for 3-4 minutes per side, until golden-brown and cooked through. Transfer to a plate, leaving the drippings in the pan.
- Build the Aromatic Base: Reduce heat to medium-low. Add minced garlic and lemon zest and sizzle for 30-60 seconds until fragrant. Pour in the white wine to deglaze, scraping up any browned bits from the bottom of the pan as the wine reduces by half.
- Create the Creamy Sauce: Stir in the chicken broth and bring to a simmer. Add the heavy cream and red pepper flakes (if using) and let it bubble gently for 2-3 minutes to thicken slightly.
- Bring It All Together: Add the drained pasta and seared chicken (with any juices) back to the pan. Toss with tongs for 1-2 minutes, allowing the pasta to finish cooking and absorb the sauce. Add a splash of reserved pasta water if the sauce is too thick.
- Finish the Sauce (Off-Heat!): Remove the pan from the heat completely. Add the grated Parmesan and toss until it melts into a smooth, glossy sauce. Stir in the fresh lemon juice and chopped parsley. Season with additional salt and pepper to taste.
- Serve immediately in warm bowls with an extra sprinkle of Parmesan.
Notes
- The Secret to a Silky, Unbroken Sauce: Always add the lemon juice OFF the heat to prevent curdling. Using full-fat heavy cream is essential for stability.
- Recipe Rescue – How to Fix a Broken Sauce: Immediately remove the pan from heat. If vigorous whisking doesn’t work, pour the sauce into a blender with 1 tablespoon of hot water and blend on low for 20-30 seconds to force it to re-emulsify.
- Pro Variations: For an asparagus version, add 1-inch asparagus pieces along with the broth and cream in Step 4. For a spinach version, wilt 5 oz of fresh spinach into the pasta at the end of Step 5.
- Storing & Reheating: Store cooled leftovers in an airtight container in the fridge for up to 3 days. Do not freeze. Reheat gently on the stove over low heat with a splash of milk or broth to loosen the sauce until warmed through. Do not use the microwave.
