
There’s a certain kind of chaos that feels unique to a weekday evening around 5 PM, isn’t there? The kids are bouncing off the walls, work is still buzzing on your phone, and the age-old question, “What’s for dinner?” looms like a final exam you forgot to study for. For years, I chased that perfect meal—one that felt like a big, comforting hug in a bowl but didn’t leave my kitchen looking like a disaster zone. I wanted a Sunday-dinner-level reward on a Tuesday-level effort.
After dozens (and I mean dozens) of tests, this Chicken Alfredo Stuffed Shells recipe is my answer. This is the one.
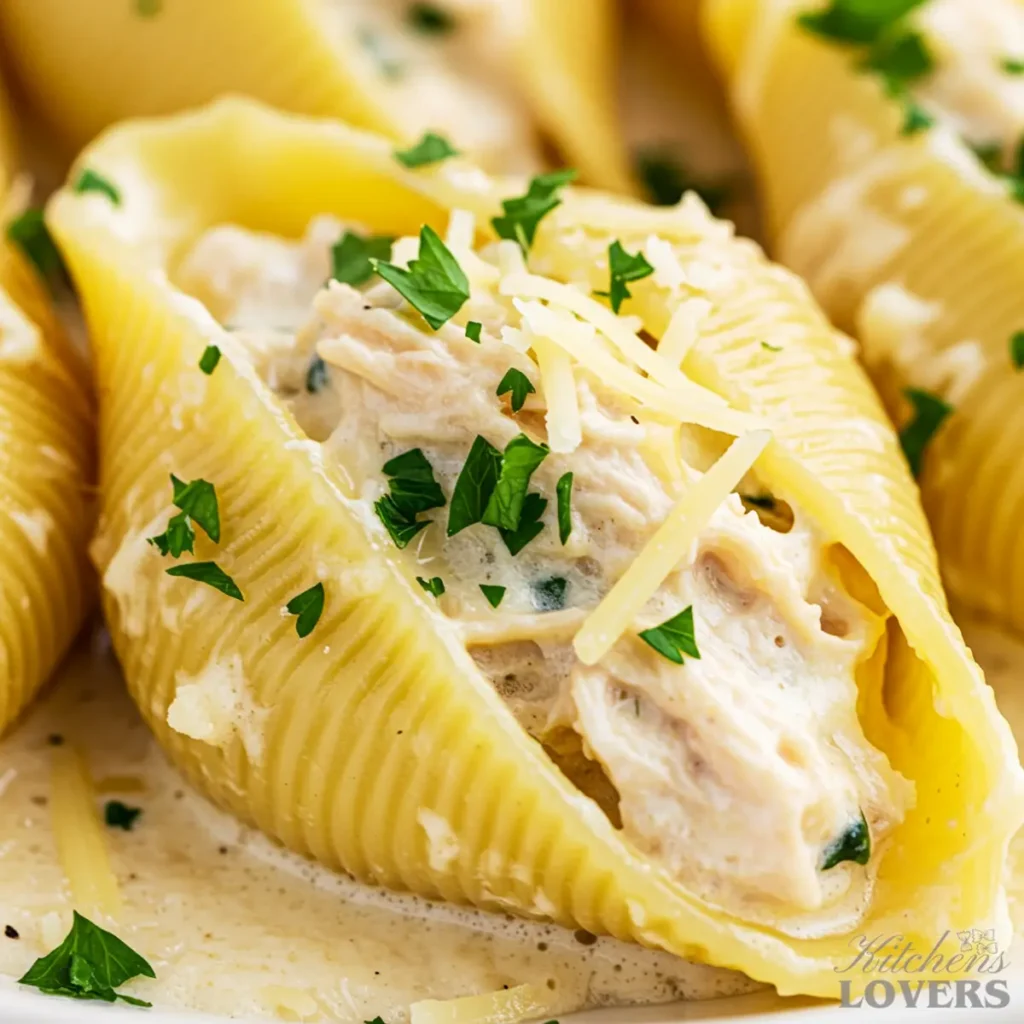
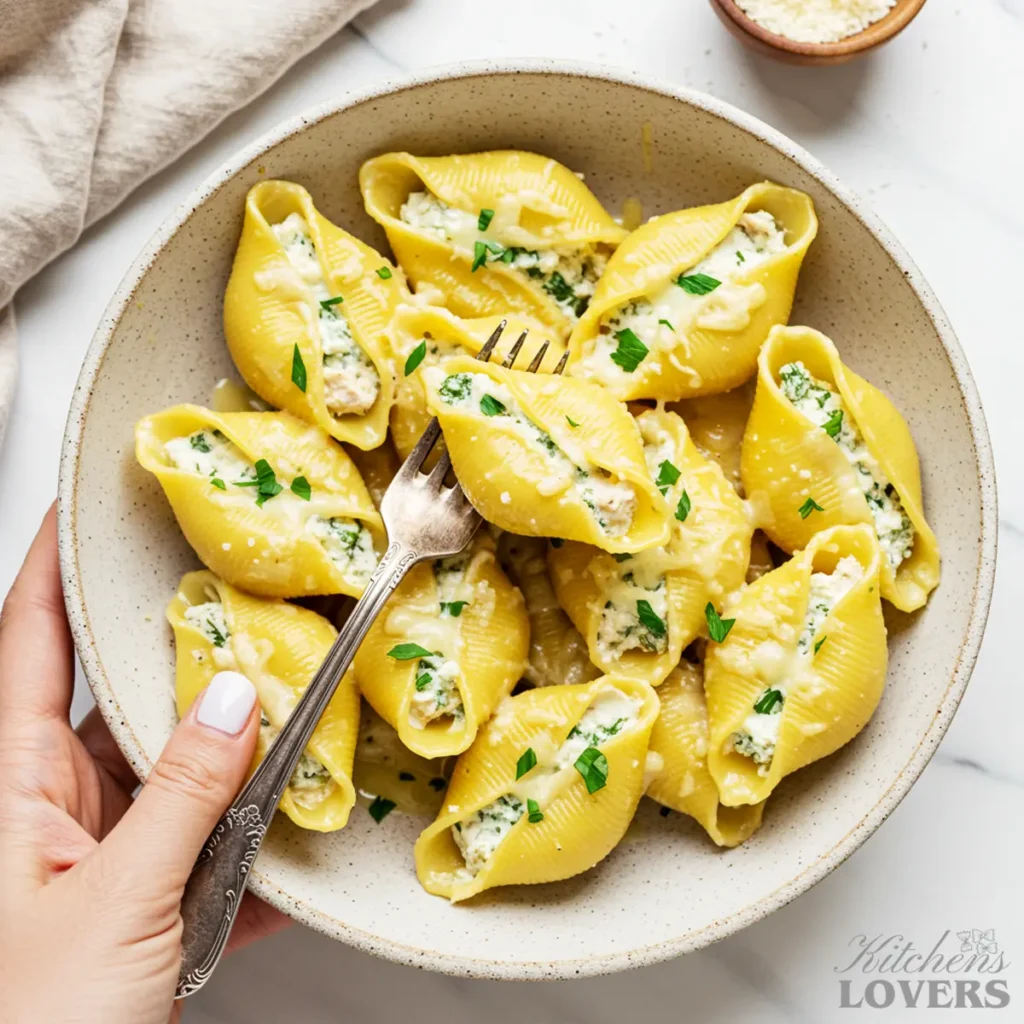
It’s the dish I make when I need a guaranteed win. Each jumbo shell is packed with a rich, savory filling of shredded chicken and three cheeses, then nestled in a velvety, homemade Alfredo sauce that tastes like it simmered for hours (but takes just minutes, I promise). Forget the gloopy, too-salty stuff from a jar. My from-scratch sauce is the secret, and it’s unbelievably simple to make.
So, take a deep breath. We’re about to turn that dinnertime chaos into a moment of pure, cheesy bliss.
Why This Recipe Is the Only One You’ll Ever Need
- A Better, Easier From-Scratch Sauce. Ditch the jarred stuff for good. This simple, homemade Alfredo delivers pure, velvety flavor without the complex steps or preservatives. It’s foolproof.
- The “No-Mess” Piping Bag Method. This isn’t a suggestion; it’s the only way to fill shells. My fast, clean, and surprisingly fun method using a zip-top bag makes the process effortless.
- A More Flavorful, Balanced Filling. We don’t just dump chicken in a sauce. We build a dedicated three-cheese and chicken filling, ensuring every shell contains the perfect ratio of flavor. The result is a richer, more satisfying bite.
- Perfect for Your Busiest Days. This entire dish is designed to be make-ahead and freezer-friendly, so you can have that “Sunday dinner” waiting for you any night of the week.
Key Ingredients for Perfect Chicken Alfredo Stuffed Shells
Great ingredients are the foundation of any unforgettable meal. But that doesn’t mean they need to be complicated or expensive. We’re using a mix of fresh, high-quality staples and one brilliant shortcut to get you the best possible results with the least amount of fuss.
For the Filling & Shells:
- 1 (12-ounce) box jumbo pasta shells
- 3 cups shredded cooked chicken (from a store-bought rotisserie chicken is ideal)
- 1 (15-ounce) container of whole milk ricotta cheese
- 2 cups shredded low-moisture mozzarella cheese, divided
- 1/2 cup grated Parmesan cheese, plus more for serving
- 1 large egg, lightly beaten
- 2 tablespoons fresh parsley, finely chopped
- 1 tablespoon fresh basil, finely chopped
- 1 teaspoon garlic powder
- 1/2 teaspoon kosher salt
For My Simple, From-Scratch Alfredo Sauce:
- 1/2 cup (1 stick) salted butter
- 3-4 cloves garlic, minced
- 2 cups heavy cream
- 1 ½ cups grated Parmesan cheese
- ½ teaspoon kosher salt
- ¼ teaspoon freshly cracked black pepper
Why We Use Rotisserie Chicken
I’m a huge advocate for from-scratch cooking, but I am an even bigger advocate for getting a delicious, stress-free dinner on the table. A store-bought rotisserie chicken is the single best shortcut for this recipe. Here’s why it’s my go-to:
- It Saves Massive Time: You skip the entire process of poaching or baking raw chicken. Just shred and go.
- It’s Perfectly Seasoned & Moist: These chickens are brined and slow-roasted, making them incredibly flavorful and tender—a result that can be hard to replicate on a busy weeknight.
- It’s Cost-Effective: When you factor in the cost of quality chicken breasts and the time to cook them, a rotisserie chicken is often the more economical choice.
Simply pull the skin off, shred the meat from the bone (you’ll have more than enough from one chicken), and you are ready to build a truly epic filling.
Why Heavy Cream Is Non-Negotiable for Alfredo Sauce
You might be tempted to lighten this sauce up by using milk or half-and-half, but I’m going to ask you to trust me on this one: use the heavy cream. It is the single most important factor for a velvety, stable sauce that will never break or turn grainy.
The Science: Heavy cream has a high-fat content (around 36%). When you introduce the Parmesan cheese and heat, this fat acts as an emulsifier, creating that rich, perfectly smooth texture. Lower-fat liquids like milk lack enough fat to create a stable emulsion, and the proteins will curdle when they hit the heat, resulting in a thin, grainy sauce.
This is the secret that separates restaurant-quality Alfredo from a disappointing one. Stick with the heavy cream for guaranteed, foolproof results.
Smart Substitutions
While I’ve tested this recipe for the best results, cooking should always be flexible. Here are a few swaps you can make in a pinch.
| Ingredient | Best Substitution | Notes |
| Rotisserie Chicken | 3 cups cooked, shredded chicken breast | Season the breast meat generously with salt, pepper, and garlic powder before cooking to make up for the flavor difference. |
| Ricotta Cheese | Small-curd, full-fat Cottage Cheese | For a similar creamy texture, though the flavor will be slightly tangier. |
| Fresh Parsley/Basil | 2 tsp dried Italian Seasoning | Add the dried herbs along with the garlic powder to allow them to meld with the other filling ingredients. |
| Jumbo Shells | Manicotti Tubes or Cannelloni | You may need slightly more filling for manicotti; just be sure to cook the pasta according to package directions. |
The Essential Equipment for Stuffed Shell Success
You don’t need a kitchen full of professional gadgets to make this recipe. In fact, most of what you need is probably in your cupboards already. But having the right tools ready to go is the first step to a smooth and enjoyable cooking process.
- Large Stockpot: For boiling the pasta shells. You need to give them plenty of room to cook without sticking together or breaking.
- A 9×13-inch Baking Dish: The classic casserole dish is the perfect size to snuggle all the shells in a single layer. Glass or ceramic works beautifully.
- A Heavy-Bottomed Skillet or Saucepan: For making the Alfredo sauce. A heavier pan will distribute heat more evenly, preventing the cream from scorching.
- Large Mixing Bowl: For combining the filling ingredients.
- Box Grater: If you follow my advice and buy blocks of Parmesan, this is a must. The cheese will melt into a much smoother, more luxurious sauce than the pre-shredded kind.
My Expert Tips for Flawless Results
After making this dish more times than I can count, I’ve learned that the difference between good and unforgettably delicious comes down to a few key techniques. These aren’t secrets, just the hard-won wisdom that solves problems before they even start. Master these, and you’re guaranteed success.
1. The Foolproof, Mess-Free Filling Technique: This Is Non-Negotiable
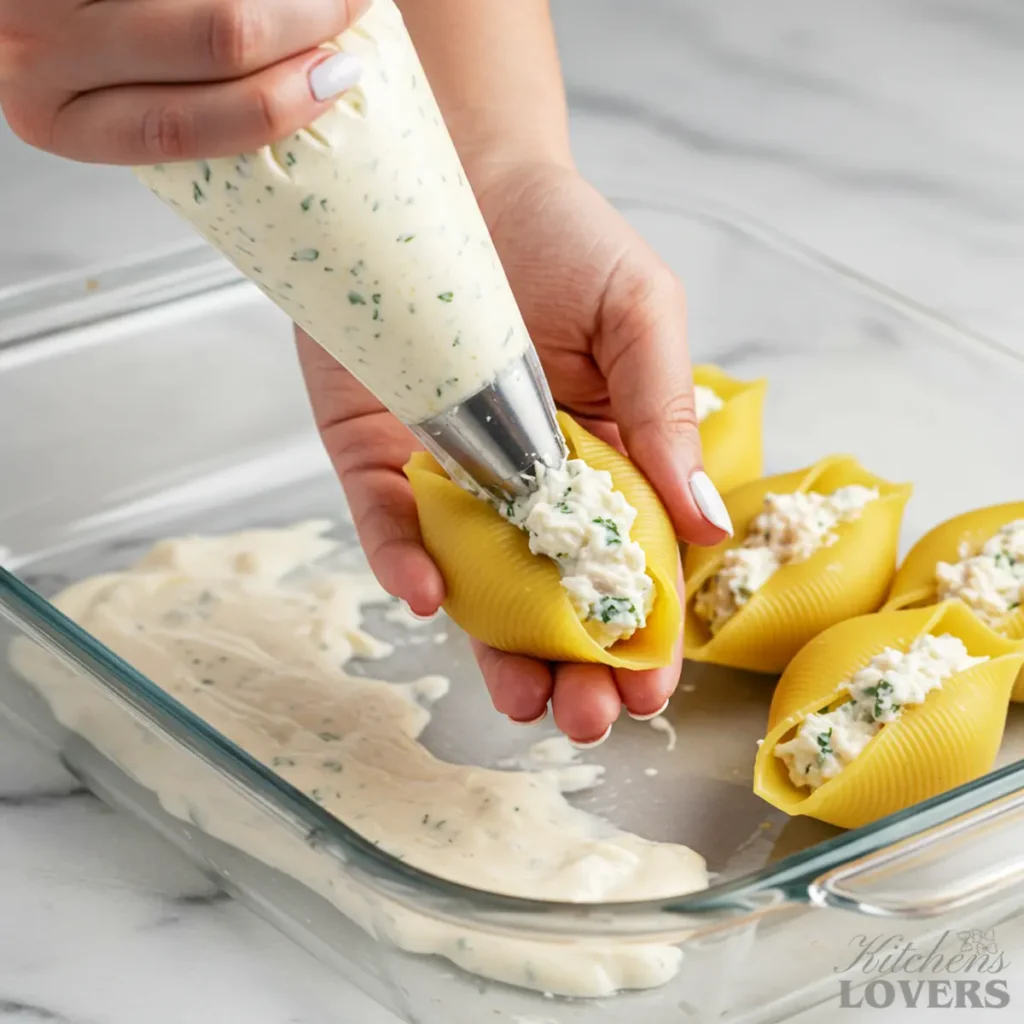
Forget trying to painstakingly stuff each shell with a teaspoon. That way leads to frustration, sticky fingers, and a mess all over your counter. Our secret weapon is a large piping bag or, just as effective, a gallon-sized zip-top plastic bag. This isn’t just a clever idea; it’s the only way to do it.
Here’s the method: Once your cheesy chicken filling is mixed, transfer it into the bag. Push the filling down into one corner and twist the top to secure it. When you’re ready, snip about a ½- to ¾-inch opening in the corner. Now, you can neatly and perfectly pipe the filling into each cooked shell in seconds. It’s clean, it’s fast, and it turns the most tedious part of the recipe into the most satisfying one. Trust me, you’ll never go back to the spoon method again.
2. How to Avoid Ripping Your Pasta Shells
There is nothing more frustrating than cooking your shells perfectly, only to have them tear as you try to fill them. It happens to everyone. Here are my three golden rules to prevent it.
- Slightly Undercook Them: Check the package directions and boil the shells for 1 to 2 minutes less than the recommended “al dente” time. They will finish cooking in the oven, and this ensures they remain firm and durable enough for stuffing.
- Give Them a Cool Rinse: As soon as you drain the shells, rinse them gently under cool (not ice-cold) water. This immediately stops the cooking process so they don’t get mushy and makes them much easier to handle.
- Cook a Few Extra: This is the pro move. Always cook 5 or 6 more shells than you think you’ll need. This gives you a buffer, so if one or two inevitably tear, you have perfect backups ready to go. No stress.
3. The Secret to a Rich, Never-Watery Ricotta Filling
Have you ever made a baked pasta where the filling seems to weep and create a watery layer at the bottom of the dish? That’s excess liquid from the ricotta. Here’s the simple trick to prevent it for the richest, creamiest filling imaginable.
For best results, place the ricotta cheese in a fine-mesh strainer set over a bowl. Let it drain in the refrigerator for at least 30 minutes (or up to a few hours) before you mix up the filling. You’ll be surprised how much clear whey drains out. By removing that excess water, you’re left with pure, concentrated creamy ricotta. This simple step makes a huge difference in the final texture of your dish, ensuring every bite is dense with flavor, not watered down.
Step-by-Step Instructions
Follow these steps exactly, and I promise you’ll have a restaurant-quality baked pasta dish coming out of your oven. Let’s start with the prep work so everything comes together smoothly.
Time Needed: 1h5minutes.
First thing’s first: Preheat your oven to 375°F (190°C).
1. Cook the Pasta Shells
Bring a large stockpot of heavily salted water to a rolling boil. Add the entire box of jumbo shells and give them a gentle stir. Now, remember our expert tip: cook the pasta for 2 minutes less than the package directs for al dente. We want them firm enough to handle.
Once cooked, drain the shells and give them a quick, gentle rinse under cool water to stop the cooking and make them easier to handle. Carefully separate them and lay them out on a baking sheet so they don’t stick together. Remember, it’s always smart to cook a few extra, just in case of tearing.
2. Prepare the Chicken & Cheese Filling
While the pasta is cooking, let’s build the heart of the dish. In a large mixing bowl, combine the drained ricotta cheese, 3 cups of shredded rotisserie chicken, 1 cup of the mozzarella cheese, ½ cup of grated Parmesan, the chopped fresh parsley and basil, the lightly beaten egg, garlic powder, and ½ teaspoon of kosher salt.
Mix it all together until it’s thoroughly combined. This rich, herby mixture is what makes every single bite so satisfying. Go ahead and transfer this filling into your large zip-top bag now and set it aside.
3. Build My Simple, From-Scratch Alfredo Sauce
This part moves fast, and the results are spectacular. You’ll never go back to a jar.
In a large skillet or saucepan over medium heat, melt the ½ cup of butter. Add the minced garlic and sauté for about 30-60 seconds, swirling the pan. The moment your kitchen fills with that incredible, nutty garlic aroma, you’re done. Do not let it brown!
Immediately pour in the 2 cups of heavy cream. Bring the mixture to a gentle simmer, letting it thicken slightly for about 3-4 minutes. You’ll see little bubbles around the edges.
Reduce the heat to low. Now, slowly sprinkle in the 1 ½ cups of grated Parmesan cheese, whisking continuously until the cheese is completely melted and the sauce is perfectly smooth and velvety. Remove from the heat and season with the salt and pepper. And just like that, you’ve made a real Alfredo sauce.
4. Assemble and Bake Your Masterpiece
This is the fun part. Grab your 9×13-inch baking dish. Spread about 1 cup of the fresh Alfredo sauce evenly across the bottom. This creates a bed for the shells and prevents them from sticking.
Now, take your zip-top bag of filling and snip off a corner (about a ¾-inch opening). Pick up a cooked shell and neatly pipe the filling inside until it’s plump and full. Place the filled shell, open-side-up, into the baking dish. Repeat until all your shells are filled and arranged snugly in the dish.
Pour the remaining, glorious Alfredo sauce all over the top of the shells, making sure to coat them evenly. Sprinkle the remaining 1 cup of shredded mozzarella over the entire dish.
Bake, uncovered, at 375°F for 25-30 minutes. You’ll know it’s ready when the sauce is bubbling around the edges and the cheesy top is melted and turning a beautiful golden brown. For an extra-crispy, browned top, you can switch the oven to broil for the last 1-2 minutes—but watch it like a hawk so it doesn’t burn!
Let the finished dish rest on your stovetop for at least 10 minutes before serving. This is crucial! It allows the sauce to thicken slightly and the shells to set, so it serves beautifully instead of running all over the plate. Garnish with a little more fresh parsley and a final dusting of Parmesan before bringing it to the table.
Pro Variations to Customize Your Dish
Once you’ve mastered the classic recipe, you can start having some fun. These are my two favorite, family-approved twists on Chicken Alfredo Stuffed Shells. They add fantastic flavor and color, turning a beloved dish into something brand new.
Variation 1: Chicken and Broccoli Stuffed Shells
This is a classic combination for a reason. The slightly sweet, earthy flavor of broccoli cuts through the richness of the Alfredo sauce beautifully. The key is preparing the broccoli correctly to avoid a watery filling.
- What You’ll Need: 1 ½ cups of frozen broccoli florets.
- The Method:
- Cook the frozen broccoli according to the package instructions (steaming or microwaving is best).
- This step is crucial: Let the broccoli cool slightly, then chop it into small, pea-sized pieces. You don’t want large, watery chunks.
- Pat the chopped broccoli very dry with paper towels to remove any excess moisture.
- Simply fold the prepared broccoli into your chicken and cheese filling mixture (in Step 2 of the main instructions) before stuffing the shells.
- The Result: Perfectly integrated bites of tender broccoli in every cheesy shell. It’s a fantastic way to get some green onto the plate, and the flavors feel like they were made for each other.
Variation 2: Chicken and Spinach Stuffed Shells
If you love spinach and artichoke dip, you are going to fall head over heels for this version. The spinach adds a savory, slightly mineral flavor that elevates the whole dish. But you MUST remove the water correctly.
- What You’ll Need: One (10-ounce) package of frozen chopped spinach.
- The Method:
- Thaw the spinach completely in the microwave or overnight in the fridge.
- Now for the most important step: you must squeeze it dry. Place the thawed spinach in the center of a clean kitchen towel or a few layers of heavy-duty paper towels. Gather the corners and wring out every single drop of water you possibly can over the sink. You’ll be amazed how much liquid comes out.
- Once you have a tight, dry ball of spinach, crumble it with your fingers.
- Fold the dry spinach into the chicken and cheese filling mixture (in Step 2 of the main instructions).
- Pro Tip: Add a tiny pinch (about ⅛ teaspoon) of ground nutmeg to the filling along with the spinach. It’s a classic pairing that you won’t necessarily taste outright, but it makes the cheesy, savory flavors pop.
- The Result: A rich, restaurant-worthy filling that tastes incredibly luxurious, with no hint of wateriness.
The Complete Guide to Storing, Freezing & Making Ahead
This recipe isn’t just a knockout for dinner tonight; it’s one of my secret weapons for planning ahead. It holds up beautifully, meaning you can do the work when you have the time and enjoy a spectacular home-cooked meal on your busiest nights. Here’s everything I’ve learned about how to do it perfectly.
Storing in the Refrigerator
If you have leftovers (and that’s a big “if”!), simply cover the baking dish tightly with aluminum foil or transfer individual portions to an airtight container. Stored properly, the shells will keep beautifully in the fridge for up to 3 days.
The “Make-Ahead” Method (Assemble Now, Bake Later)
This is my go-to strategy for dinner parties or for simply getting ahead of a chaotic weeknight. You can assemble the entire dish a day or two before you plan to bake it.
- Assemble Completely: Follow all the recipe steps right up until the final bake. Fill the shells, arrange them in the baking dish, and pour the sauce over top.
- Cover & Chill: Do not bake. Instead, cover the dish tightly with both plastic wrap (to create a seal) and a layer of aluminum foil (to protect it). Store it in the refrigerator for up to 48 hours.
- Bake from Chilled: When ready to eat, preheat your oven. Remove the plastic wrap and foil. You may need to add about 10-15 minutes to the initial baking time since the dish is starting from a cold temperature. Bake until bubbly and golden.
Freezing Your Stuffed Shells: Two Foolproof Methods
A freezer stocked with a pan of these shells is like money in the bank. You are locking in a future stress-free dinner. While this process is simple, it’s always smart to follow established food safety guidelines for freezing to ensure the best quality and results.
Method 1: Freezing an Unbaked Casserole (Best for a Fresh-Baked Taste)
This is the best method if you’re planning to freeze the dish.
- Use a freezer-safe baking dish (aluminum foil pans are fantastic for this).
- Assemble the entire dish as directed, but do not bake it.
- Wrap the dish in a double layer of protection to prevent freezer burn. First, a tight layer of plastic wrap pressed against the surface, followed by a tight layer of heavy-duty aluminum foil.
- Label the dish clearly with the name and date. Freeze for up to 3 months.
To Bake from Frozen: Do not thaw! Thawing can make the pasta mushy. Preheat your oven to 375°F. Remove the plastic wrap and re-cover with the foil. Bake, covered, for 50-60 minutes. Then, remove the foil and bake for another 15-20 minutes, or until the sauce is bubbly and the cheese is golden brown.
Method 2: Freezing Baked Leftovers
Already baked it? No problem.
- Let the casserole cool completely. This is a crucial step.
- For best results, divide leftovers into single-serving or family-sized portions in freezer-safe, airtight containers.
- Label and freeze for up to 2 months for best quality.
The Best Way to Reheat for Perfect Results
Please, I beg you, step away from the microwave. The secret to reviving these shells to their original glory—with creamy sauce and perfect pasta texture—is to use the oven. The gentle, ambient heat rehydrates the dish and melts the cheese evenly, whereas a microwave turns pasta rubbery and can cause the sauce to separate.
- From the Refrigerator: Place portions in an oven-safe dish and cover with foil. Bake at 350°F (175°C) for about 20-25 minutes, or until heated through.
- From the Freezer (Baked Leftovers): Place the frozen portions in an oven-safe dish, cover with foil, and bake at 375°F (190°C) for 30-40 minutes, until heated through. You can remove the foil in the last 5 minutes to help the cheese get bubbly again.
What to Serve with Chicken Alfredo Stuffed Shells
When you build a menu around a truly satisfying and decadent pasta centerpiece—like these shells or even our fan-favorite Four Cheese Pasta—the key is always balance. The goal is to complement the star of the show, not compete with it. You want something that will cut through the richness and cleanse your palate, making each new bite of the cheesy pasta feel just as good as the first.
Here are three of my favorite high-impact pairings.
1. Simple Tomato Bruschetta on Toasted Crostini
This is a brilliant two-for-one side dish. You get the crispy, satisfying crunch of toasted baguette slices that can stand up to the rich sauce, but they’re topped with a payload of freshness. The classic bruschetta topping—diced fresh tomatoes, garlic, basil, and a drizzle of balsamic vinegar—provides a sharp, acidic counterpoint that perfectly slices through the creamy Alfredo. It wakes up your whole palate.
2. Sautéed Broccolini with Garlic and Lemon
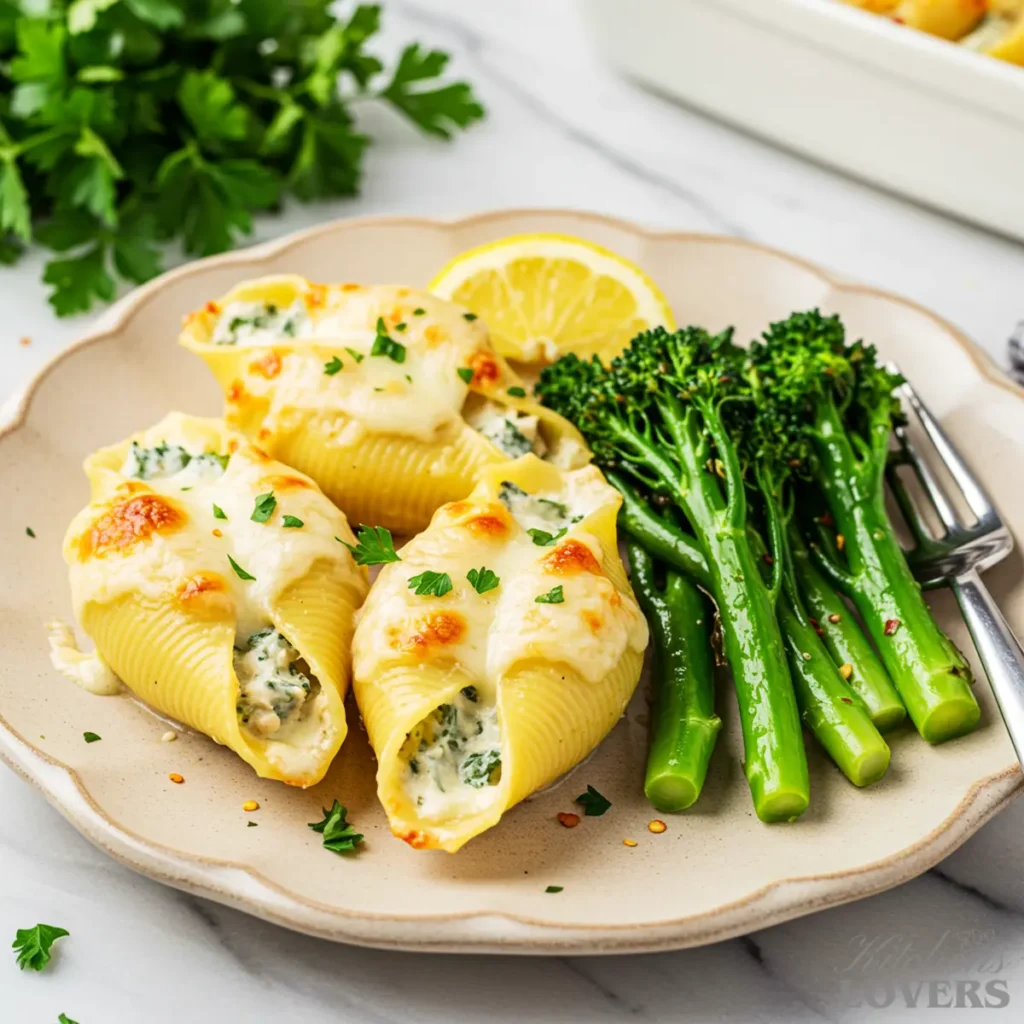
A simple, pan-seared green vegetable is an elegant and healthy way to round out the meal. Broccolini is my top choice here. It’s quicker to cook than broccoli and has a sophisticated, slightly bitter edge that is absolutely phenomenal against the savory cheese and cream. Sauté it in a hot pan with a little olive oil and sliced garlic until it’s bright green and tender-crisp. The most important part: finish with a generous squeeze of fresh lemon juice right at the end. That flash of acidity is essential.
3. A Crisp and Tangy Italian Chopped Salad
Move beyond a simple leafy green salad and embrace the power of a chopped salad. The magic here comes from the variety of textures and tangy ingredients. Imagine a mix of crisp romaine, diced salami, chickpeas, red onion, and, most importantly, tangy pepperoncini peppers all tossed in a zesty red wine vinaigrette. Each bite is a flavor explosion that resets your taste buds, making you eager for the next creamy, cheesy spoonful of the main dish.
Your Questions, Answered: A Troubleshooting FAQ
Cooking should be a joy, not a mystery. Here are the answers to some of the most common questions I get, designed to help you nail this recipe on your very first try.
Sauces Made Simple
This happens when the heat is too high or the dairy isn’t rich enough. High heat causes the cheese to “shock” and separate, while using milk or half-and-half instead of heavy cream makes the sauce prone to breaking.
The Cause: Overheating the cheese or using low-fat dairy.
The Solution: Always use heavy cream for stability. When adding Parmesan, reduce the heat to the lowest setting or remove the pan from the stove and whisk in the cheese gradually. This keeps the sauce smooth and emulsified. If your sauce breaks, you can sometimes fix it by taking it off the heat and very slowly whisking in a tablespoon of hot cream until it comes back together.
The #1 cause of a watery filling is excess moisture from your cheese. It’s that simple. While it might not seem like much, the hidden water in some brands of ricotta cheese will weep out during baking, creating a disappointing pool at the bottom of your dish.
The Cause: You didn’t drain your ricotta. If you’ve added vegetables like spinach that weren’t squeezed completely dry, that’s the other major source of water.
The Solution: As I mentioned in my Expert Tips, you must drain the ricotta in a fine-mesh sieve for at least 30 minutes before mixing the filling. This is a non-negotiable step for a rich, dense, and creamy filling. There is no good way to fix a watery filling once it’s made, so prevention is everything here.
Baking & Cheese Secrets
Pasta acts like a sponge, soaking up sauce as it bakes. A dry dish usually means there wasn’t enough sauce added or it was baked too long.
The Cause: Too little sauce on the shells or overbaking, which makes the liquid evaporate.
The Solution: Use the full amount of sauce in the recipe and spread it evenly so no shell is uncovered. Bake only until the dish is bubbling hot and the cheese turns golden. If preparing ahead, remember the pasta will absorb sauce while it sits. To prevent dryness, add about 1/4 cup of extra sauce over the top just before baking.
Absolutely! Cooking should be about using what you love (and what you have!). While the cheeses I list are my “gold standard” combination, you can absolutely make some smart swaps.
For the filling: Instead of mozzarella, you could use a smoked provolone for a sharper flavor or a creamy Fontina, which melts beautifully and gives a slightly nutty taste. I would stick with ricotta as the base, however, as its texture is unique.
For the Sauce: While Parmesan is classic, a mix of Parmesan and Pecorino Romano cheese will give your sauce a saltier, sharper kick. Just be sure of two things: 1) Always use a hard, aged cheese in the sauce, not a soft melting cheese like mozzarella or cheddar. 2) Always, always grate it yourself from a block. The pre-shredded bagged cheeses contain anti-caking starches that will make your sauce grainy.
Share Your Success & Discover More Pasta!
I put my heart into perfecting this Chicken Alfredo Stuffed Shells recipe, and I truly believe it’s the best out there. Now, I’d love to know how it turned out for you!
Did you try one of the variations? Did you discover a new tip? Please leave a comment and a star rating below to let me know how you and your family enjoyed it. Your feedback not only makes my day, but it also helps other home cooks find success in their own kitchens!
And if you fell in love with this recipe, you’re in the right place. For another cheesy, satisfying dish that uses a similar stuffing technique, you absolutely have to check out my Perfect Chicken Manicotti. And for even more weeknight-winning ideas, be sure to explore my ultimate guide to Crave-Worthy Chicken Pasta Dinners.
Join The KitchenLovers Family
Want more foolproof recipes and expert tips sent directly to your inbox? Sign up for the KitchenLovers newsletter. You’ll get my best, family-tested dishes that make dinner simple, delicious, and stress-free.
About Kate Thompson
Kate Thompson created KitchensLovers.com to simplify dinner for real-life families. She develops easy, flavor-packed chicken pasta recipes tested dozens of times to guarantee results. Her motto: ‘Easy Pasta, Every Time.’
The Science of a Perfect, Simple Alfredo Sauce
Have you ever wondered why some homemade Alfredo sauces are divinely creamy while others end up as a gritty, oily mess? The answer isn’t luck; it’s simple food science. Many home cooks are intimidated by from-scratch cream sauces because they fear they will “break.” My recipe is designed to eliminate that fear completely by using a more stable, reliable method than the traditional, risky techniques.
Our Method: A Stable Cream Emulsion
Contrary to some complex recipes you might see that use flour or eggs, our sauce is built on a simple, powerful principle: a stable fat emulsion.
When you gently heat butter and heavy cream, the high percentage of butterfat in the cream (around 36%) creates a beautifully stable base. This fat can hold the water from the cream and the solids from the cheese in a perfect, harmonious suspension. When you whisk in the finely grated Parmesan off the heat, it melts seamlessly into this stable liquid.
The result is a sauce that is velvety, smooth, and much less likely to separate or turn grainy. It’s a method that relies on the quality of just a few ingredients working in harmony. It is simple, direct, and, most importantly, incredibly reliable.
Why Traditional Egg-Based Sauces Are So Risky
Some ultra-traditional recipes (often related to carbonara, but sometimes adapted for Alfredo) call for enriching the sauce with raw egg yolks. To do this, you must “temper” the yolks—a delicate process of slowly drizzling the hot cream into the eggs to gently raise their temperature without scrambling them.
This technique adds richness, but it is fraught with risk. If your cream is even a few degrees too hot, if you pour too quickly, or if you stop whisking for a second, the proteins in the yolk will instantly seize and cook. The result? You get tiny bits of scrambled egg in your sauce, and the texture is ruined forever.
For a dish like Chicken Alfredo Stuffed Shells, where the sauce needs to be both delicious and absolutely foolproof, taking that kind of risk simply isn’t worth the marginal reward. We choose the smarter, more reliable path to guarantee a luxuriously creamy sauce every single time.
This recipe was last tested and updated in August 2025 to ensure perfect results.
Chicken Alfredo Stuffed Shells Recipe
Equipment
- Large Stockpot
- 9×13 inch Baking Dish
- Heavy-Bottomed Skillet or Saucepan
- Large Mixing Bowl
- Box Grater
- Large Piping Bag or Gallon-Sized Zip-Top Bag
Ingredients
For the Filling & Shells
- 1 12-ounce box jumbo pasta shells
- 3 cups shredded cooked chicken from a rotisserie chicken is ideal
- 1 15-ounce container whole milk ricotta cheese
- 2 cups shredded low-moisture mozzarella cheese divided
- 1/2 cup grated Parmesan cheese
- 1 large egg lightly beaten
- 2 tablespoons fresh parsley finely chopped
- 1 tablespoon fresh basil finely chopped
- 1 teaspoon garlic powder
- 1/2 teaspoon kosher salt
For My Simple, From-Scratch Alfredo Sauce
- 1/2 cup 1 stick salted butter
- 3-4 cloves garlic minced
- 2 cups heavy cream
- 1 ½ cups grated Parmesan cheese
- ½ teaspoon kosher salt
- ¼ teaspoon freshly cracked black pepper
Instructions
Prep
- Preheat your oven to 375°F (190°C).
Cook the Pasta Shells
- Bring a large stockpot of heavily salted water to a rolling boil. Cook shells for 2 minutes less than package directions.
- Drain, rinse gently under cool water, and separate on a baking sheet.
Prepare the Filling
- In a large bowl, combine the ricotta, chicken, 1 cup mozzarella, ½ cup Parmesan, parsley, basil, egg, garlic powder, and salt.
- Mix thoroughly and transfer the filling into a large zip-top bag.
Build the Sauce
- Melt butter in a skillet over medium heat. Sauté minced garlic for 30-60 seconds until fragrant.
- Pour in heavy cream, bring to a simmer, and cook for 3-4 minutes.
- Reduce heat to low and whisk in 1 ½ cups Parmesan until smooth. Season with salt and pepper.
Assemble and Bake
- Spread 1 cup of sauce in a 9×13-inch baking dish.
- Pipe filling into shells and arrange in the dish.
- Pour remaining sauce over shells and top with the final 1 cup of mozzarella.
- Bake for 25-30 minutes until bubbling and golden.
- Let rest for 10 minutes before serving.
Notes
- Kate Expert Tips:
The No-Mess Filling Method: Using a zip-top or piping bag is the cleanest, fastest way to fill the shells.
Avoid Tearing Shells: Slightly undercook the pasta and rinse with cool water to keep them firm.
Prevent Watery Filling: For the richest texture, drain your ricotta cheese in a fine-mesh sieve for 30 minutes before mixing the filling. - Pro Variations:
Chicken and Broccoli: Fold in 1 ½ cups of cooked, chopped, and well-dried broccoli florets into the cheese filling.
Chicken and Spinach: Fold in one 10-ounce package of frozen spinach that has been thawed and squeezed completely dry. - Make-Ahead & Storage:
The fully assembled, unbaked dish can be covered and refrigerated for up to 48 hours before baking. You can also freeze the unbaked casserole for up to 3 months. Bake from frozen, covered with foil, at 375°F for 50-60 minutes, then uncover and bake for another 15-20 minutes until bubbly.
