
Forget the final score—for years, the most stressful part of any game day was the food. I’d have friends begging for a gooey, baked pasta casserole, while others wanted a simple crockpot meal. My kitchen was chaos.
Then, I finally cracked the code.
AssessmentI developed a single, foolproof ‘master recipe’ for Buffalo Chicken Pasta that’s so good… it can be easily adapted into a lightning-fast skillet dinner, a cheesy bake, a simple slow cooker meal, or a vibrant potluck pasta salad. This isn’t just another recipe; it’s your complete playbook for the ultimate comfort food. This is the one you’ll be famous for.
No more broken, oily sauces. No more disappointing results. Just perfectly spicy, ridiculously creamy, and totally addictive pasta, every single time.
Why This Recipe Works
- The Ultimate 4-in-1 Playbook: This isn’t just one recipe; it’s a complete system. I’ll show you how to master the skillet version, then transform it into a bubbling casserole, an effortless crockpot meal, or a brilliant potluck pasta salad.
- Guaranteed Creamy, Non-Greasy Sauce: Forget those recipes that leave you with an oily mess. My method uses a simple but critical technique to create a velvety, stable Buffalo cream sauce that clings perfectly to every noodle. It’s a total game-changer.
- Professionally Developed, Home-Kitchen Perfected:This recipe was born in a pro kitchen, where I tested every variable—from cream cheese brands to pasta shapes—dozens of times. I ironed out every kink so it works flawlessly in your kitchen, not just in a test lab.
Key Ingredients for Flawless Buffalo Chicken Pasta
A great recipe is all about strategy, and our strategy begins with the shopping list. Using the right components is what separates a decent dish from a spectacular one. We’re building flavor with purpose.
- Pasta: 1 lb (16 oz) short pasta, like cellentani, cavatappi, or penne
- These shapes are fantastic because their ridges and curls act like tiny nets, grabbing every last drop of that creamy Buffalo sauce.
- Boneless, Skinless Chicken Breasts or Thighs: 1.5 lbs, cut into 1-inch cubes
- Unsalted Butter: 4 tablespoons
- Olive Oil: 1 tablespoon
- Yellow Onion: 1 medium, finely chopped
- Garlic: 4 cloves, minced
- All-Purpose Flour: 2 tablespoons
- Low-Sodium Chicken Broth: 1 ½ cups
- Buffalo Hot Sauce: ½ to ⅔ cup (use ½ for mild, ⅔ for spicier)
- Full-Fat Block Cream Cheese: 8 oz, softened and cubed
- Sharp Cheddar Cheese: 2 cups, freshly shredded
- For Serving (Optional):
- Crumbled blue cheese or a drizzle of ranch/blue cheese dressing
- Thinly Sliced Green Onions or Fresh Chives
The Right Buffalo Sauce (And Why Wing Sauce Is Different)
This is a rookie mistake I see all the time. You see a bottle labeled “Buffalo Wing Sauce,” and you grab it. Makes sense, right? Wrong. Most “wing sauces” are just regular hot sauce that has already been mixed with butter or oil. And we want to control the fat in our sauce. Adding a pre-made butter sauce to our cream sauce is a one-way ticket to a greasy, separated mess.
For this recipe, you need a pure, cayenne-based hot sauce. Frank’s RedHot Original is the undisputed king for that classic, tangy flavor profile, and it’s what I use exclusively. It provides the pure heat and vinegar tang we need, and we’ll add our own high-quality butter and cream cheese to create a perfectly balanced, velvety sauce from scratch.
The Secret to a Creamy, Not Greasy, Sauce: Full-Fat Cream Cheese
Pay attention, because this is the most important ingredient in this entire dish. You MUST use full-fat, block-style cream cheese. Not the whipped kind in a tub, and absolutely, positively not the low-fat or fat-free versions.
Here’s why:Full-fat cream cheese is a powerhouse emulsifier. It contains the perfect ratio of fat and protein to bind the chicken broth and hot sauce together, creating a ridiculously creamy, stable sauce that will never break or turn oily. Low-fat versions replace that crucial fat with water and stabilizers that simply can’t handle the heat. They will break apart, curdle, and leave you with a greasy, watery tragedy. Trust me on this. I’ve seen it happen, and it’s heartbreaking.
Smart Swaps & Substitutions
| Ingredient | Best Substitution | Notes |
| Chicken Breasts/Thighs | 2-3 cups Shredded Rotisserie Chicken | The ultimate time-saver. Ensures juicy chicken with zero extra cook time. Stir it in at the very end. |
| Cheddar Cheese | Monterey Jack, Colby, or a Mexican Blend | These provide a slightly milder, gooey melt. Self-shredding is non-negotiable to avoid the starchy additives that make sauces grainy. |
| All-Purpose Flour | 1 tbsp Cornstarch + 2 tbsp Cold Water (a slurry) | For a gluten-free option, whisk this in with the broth. The sauce will thicken as it simmers. |
| Yellow Onion | 1 tsp Onion Powder | Not as great as fresh, but it works in a pinch. Add it with the garlic. |
Let’s be clear: great ingredients are useless if you’re fighting your equipment. A frustrating cooking process leads to a frustrating result. The right tools make the process smooth, clean, and foolproof. For this recipe, we keep it simple, but these three items are my non-negotiables for getting it right.
Essential Equipment for This Recipe
- A large 12-inch skillet or 5-quart Dutch oven
This is the workhorse. You need plenty of surface area for two key reasons. First, it lets you sear the chicken cubes properly without them steaming in their own juices—that’s how you get that gorgeous golden-brown color and flavor. Second, it gives you enough room to build that big, luscious sauce and toss the pasta without it sloshing all over your stovetop. Overcrowding the pan is a classic home-cook mistake, and this one tool prevents it. - A Box Grater
Please, do not skip this. As I mentioned, the pre-shredded bagged cheeses are coated with powders like cellulose to prevent caking. Those powders are the enemy of a silky, smooth sauce and the #1 cause of a grainy texture. A block of sharp cheddar and a simple box grater are your tickets to a professional-quality, velvety cheese sauce. It takes 60 seconds, and it’s worth every one of them. - A Sturdy Whisk
When it’s time to melt the cream cheese and cheddar into the broth, a good whisk is your best friend. It helps you break down the cheeses quickly and emulsify them into the liquid, ensuring a perfectly smooth, lump-free consistency from top to bottom. A flimsy one won’t cut it; you need something with a little backbone.
This is where we separate the amateurs from the pros. A good recipe is one thing, but knowing how to anticipate and solve problems on the fly is what guarantees a flawless dish every single time. After making hundreds of cream sauces and pasta dishes, I’ve seen it all. Let’s walk through the three most common pitfalls so you can avoid them entirely.
Expert Tips for Flawless Results
Prevent common pitfalls and achieve creamy, delicious perfection every time.
Why Did My Sauce Break or Turn Greasy?
This is the #1 issue with any Buffalo cream sauce, and the reason so many other recipes fail. You’ve got a puddle of orange oil sitting on top of a sad, clumpy sauce. Don’t panic. It’s a broken emulsion, and we can fix it.
- Why It Happened: This usually happens for two reasons. One, the heat was way too high when you added the dairy. Boiling cream cheese is a recipe for disaster. Two, you used a low-fat cream cheese or another low-fat dairy product. As I said before, fat is the key emulsifier that holds the sauce together. Not enough fat, and the oil from the butter and cheese has nothing to bind to, so it separates.
- Here’s How to Fix It (and Prevent It): First, prevention is the best medicine. ALWAYS add the cream cheese and cheddar with the burner on low heat. Never let it boil. To fix a broken sauce, pull the pan off the heat immediately. Let it cool for a minute, then add a tablespoon of the hot pasta water (the starch helps!) or warm chicken broth and whisk vigorously. And I mean vigorously. Keep adding a tablespoon of liquid and whisking until it comes together into a smooth, creamy sauce.
What’s The Secret To Perfectly Cooked (Not Mushy) Pasta?
Perfectly cooked pasta is the soul of this dish. You want it tender but with a distinct, satisfying bite. It’s a fine line, but easy to walk if you know the secret.
- Why It Happened: Pasta is like a sponge. If you cook it to a perfect al dente according to the box directions and then toss it into a pan of simmering sauce, it will keep on cooking. By the time you serve it, it’s turned to mush. On the flip side, just dumping it in undercooked will leave you with a chalky, chewy texture.
- Here’s the Pro Technique:Check the package directions for the al dente cooking time, then subtract 2 minutes. For example, if it says 11 minutes, you’ll pull it out at 9 minutes. It should still be a little too firm to eat. Drain it (but save a cup of that starchy water!) and immediately toss it into your finished sauce. The residual heat from the sauce will cook the pasta those final two minutes, absorbing flavor as it finishes. It’s a simple trick that guarantees pasta perfection.
Why Does My Sauce Taste Bitter? (How to Avoid Burnt Garlic)
Yes, you almost certainly did. That acrid, bitter flavor is the ghost of burnt garlic, and unfortunately, there’s no way to fix it once it’s in the sauce. The only solution is prevention.
- Why It Happened: Minced garlic cooks—and burns—incredibly fast. Way faster than the chopped onions. Most people make the mistake of throwing them into the hot oil at the same time. By the time the onions are soft and translucent, the garlic is blackened and bitter.
- Here’s How to Avoid It:Always cook your onions first. Let them soften over medium heat for a good 5-7 minutes. Only then should you add the minced garlic. Stir it constantly for just 30 to 60 seconds. The second you smell that nutty, fragrant garlic aroma filling your kitchen, you’re done. Immediately move on to the next step (like adding the flour or broth) to stop the cooking process.
Step-by-Step Instructions (One-Pot Skillet Method)
1. Cook the Pasta & Prep the Chicken
Get a large pot of water boiling for your pasta. Once it’s at a rolling boil, salt it generously—it should taste like the sea. This is your only chance to season the pasta itself! Add the pasta and cook for 2 minutes less than the package directions for al dente. Just before you drain it, scoop out and save at least one cup of the starchy pasta water. We call this “liquid gold” for a reason; it’s perfect for adjusting the sauce later. While the pasta cooks, pat your chicken cubes dry and season them well with salt and pepper.
2. Sear the Chicken & Build the Flavor Base
Place your large skillet or Dutch oven over medium-high heat and add the olive oil and 2 tablespoons of the butter. When the butter is melted and foaming, add the chicken in a single layer. Don’t crowd the pan; work in batches if you have to! Sear the chicken for 2-3 minutes per side, just until it’s beautifully golden-brown. It won’t be cooked through yet, and that’s exactly what we want. Remove the chicken to a clean plate.
Reduce the heat to medium and add the remaining 2 tablespoons of butter. Add the chopped onion and sauté, stirring occasionally, until it’s soft, translucent, and smells sweet, about 5-7 minutes. Now, add the minced garlic. Stir it constantly for just 30-60 seconds. The second your kitchen fills with that irresistible nutty, garlic aroma, you’re ready for the next step. Do not let it brown!
3. Create the Velvety Buffalo Sauce
Sprinkle the all-purpose flour over the onions and garlic and cook for about one minute, stirring constantly with your whisk to toast away the raw flour taste. This is a simple roux that will give our sauce its body.
Slowly pour in the chicken broth while whisking continuously. Scrape up any of those tasty browned bits (the fond) from the bottom of the pan—that’s pure flavor! Whisk in the Buffalo hot sauce and bring the mixture to a gentle simmer. Once it bubbles, immediately reduce the heat to low. This part is crucial.
Add your softened, cubed cream cheese, whisking until it has completely melted into the sauce, turning it a beautiful, creamy pale orange. Now, add the shredded cheddar cheese, one handful at a time, stirring gently until each handful is melted before adding the next. Keep the heat low and slow to ensure the sauce stays silky and never breaks.
4. Combine and Finish the Dish
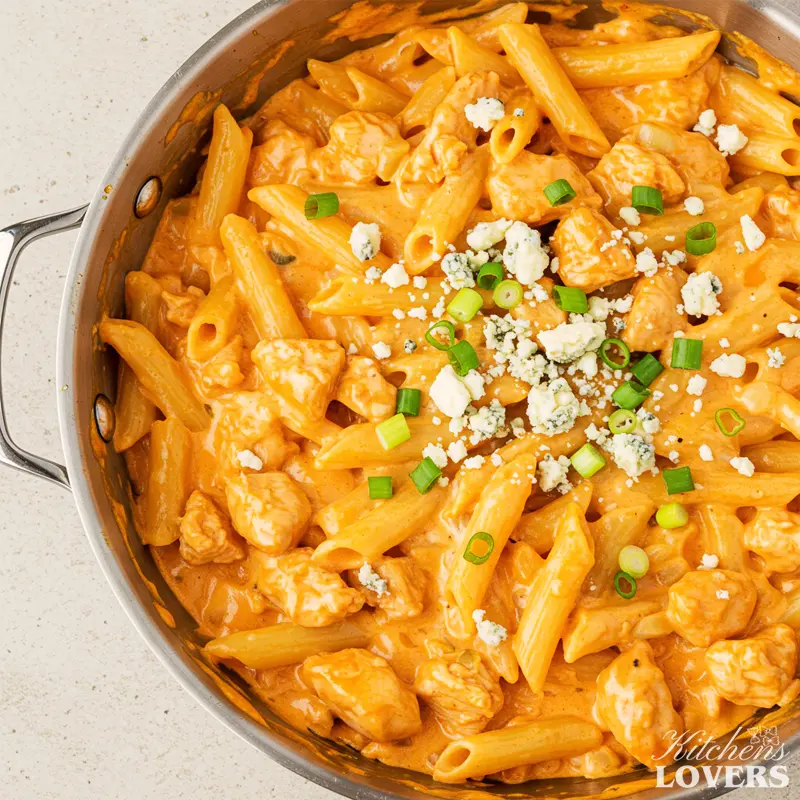
Return the seared chicken and any accumulated juices from the plate back into the skillet. Add the drained, undercooked pasta. Stir everything together gently, allowing the sauce to hug every single noodle. Let it all simmer over low heat for another 2-3 minutes, just until the chicken is cooked through and the pasta is perfectly al dente, having absorbed all that amazing flavor. If the sauce seems a little too thick, stir in a splash of your reserved pasta water until it reaches the perfect consistency.
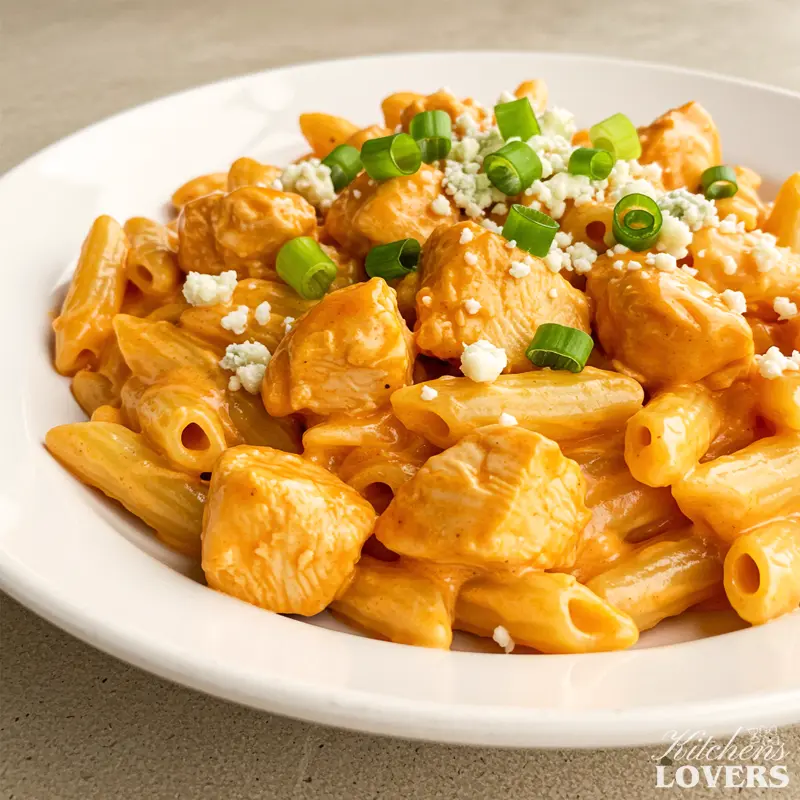
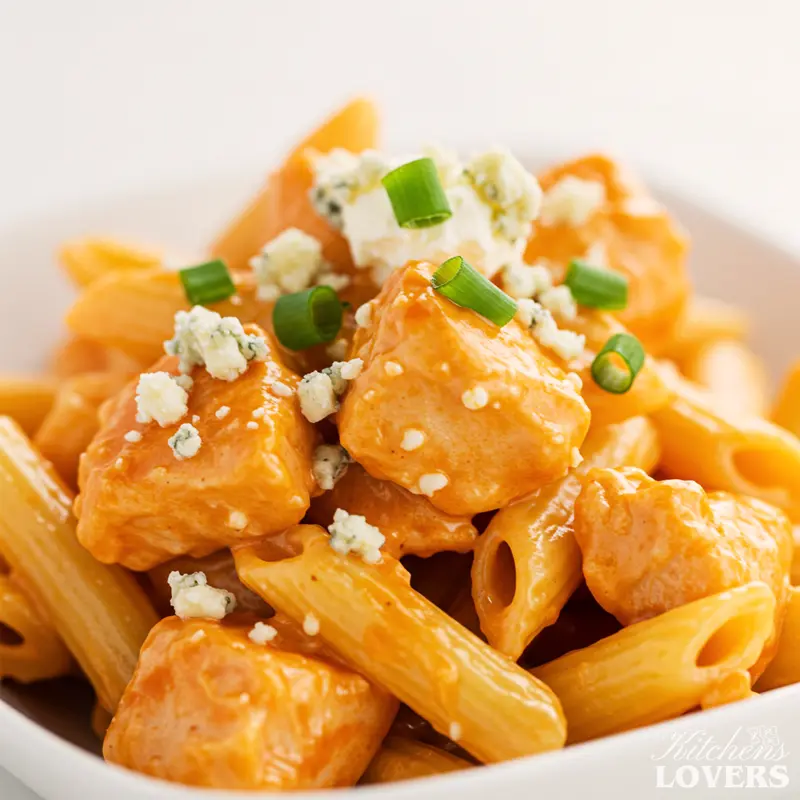
Serve immediately, garnished with a sprinkle of fresh green onions, chives, or a crumble of blue cheese.
NOTE: Your delicious one-pot skillet dinner is now ready to serve! For the baked pasta or crockpot versions, follow the instructions in the ‘Pro Variations’ section below.
Pro Variations to Customize (Your Full Playbook!)
You’ve perfected the base recipe—now, let’s adapt it for any occasion.
Variation 1: The Crowd-Pleasing Buffalo Chicken Pasta Bake
This is for when you want that gooey, cheesy, bubbling-hot casserole experience. It’s perfect for making ahead and is an absolute showstopper on a buffet table.
How to Do It:
- Prepare the Master Recipe: Follow the one-pot skillet recipe in Part 5 all the way through Step 4. You should have a finished skillet of creamy Buffalo Chicken Pasta.
- Assemble the Casserole: Transfer the finished pasta into a greased 9×13 inch baking dish and spread it into an even layer. For an extra-cheesy crust, sprinkle an additional 1 cup of shredded sharp cheddar and ¼ cup of blue cheese crumbles over the top. For a crunchy topping, toss ½ cup of panko breadcrumbs with 1 tablespoon of melted butter and scatter that over the cheese.
- Bake to Perfection: Bake in a preheated oven at 375°F (190°C) for 15-20 minutes, or until the sauce is bubbly and the cheese on top is melted and just beginning to brown. Let it rest for 5 minutes before serving.
Variation 2: The ‘Set-it-and-Forget-it’ Crockpot Method
This method is your best friend on a busy day. Do a little prep in the morning and come home to an amazing-smelling house and a dinner that’s 90% done.
How to Do It:
- Don’t Skip the Sear! I know it’s tempting to just dump everything in, but for the best flavor, you must sear the chicken and sauté the aromatics first. Follow Step 2 from the master recipe (Sear the Chicken & Sauté Aromatics) in a skillet on the stove.
- Load the Slow Cooker: Transfer the seared chicken, sautéed onions, and garlic to the bowl of your slow cooker. Stir in the chicken broth, Buffalo hot sauce, and seasonings (salt and pepper). Do NOT add the dairy or pasta yet.
- Cook on Low or High: Cover and cook on LOW for 3-4 hours or on HIGH for 1-2 hours, until the chicken is tender and cooked through.
- Finish the Dish: About 30 minutes before you’re ready to serve, cook your pasta on the stovetop according to the master recipe instructions (2 minutes less than al dente). Stir the softened cream cheese into the slow cooker until it’s melted and incorporated, then stir in the shredded cheddar. Once the cheese is melted, add the drained, cooked pasta and stir to combine. Let it all heat through for another 10-15 minutes, then serve.
Variation 3: The Perfect Potluck Buffalo Chicken Pasta Salad
Taking all the flavors you love and turning them into a chilled, potluck-perfect salad is a stroke of genius. It’s creamy, tangy, and can be made a day in advance.
How to Do It:
- Cook and Cool Key Components: Cook your chicken and pasta. You can either sear chicken cubes as directed in the master recipe or simply poach them. Let both the cooked chicken (diced or shredded) and the cooked pasta cool completely. Rinsing the pasta with cold water will stop the cooking and cool it faster.
- Make the Dressing: In a large bowl, whisk together ¾ cup of either ranch or blue cheese dressing, ½ cup of Buffalo hot sauce, and 4 oz of softened cream cheese until smooth. Season with a little salt, pepper, and garlic powder. This creamy dressing is the perfect binder for the salad.
- Combine the Salad: To the bowl with the dressing, add the cooled pasta and cooled chicken. Add 1 cup of diced celery, ½ cup of shredded carrots, and ¼ cup of finely diced red onion for that classic crunch.
- Chill and Serve: Fold everything together gently until well-combined. Cover and refrigerate for at least 2 hours before serving to allow the flavors to meld. It’s even better the next day.
Storing, Freezing & Reheating
One of the best things about this dish is how well it holds up—if you treat it right. Let’s make sure your leftovers are just as impressive as the main event.
Storing Leftovers
Once the pasta has cooled completely (never put a hot dish in the fridge!), transfer it to an airtight container. It will keep beautifully in the refrigerator for up to 4 days. Be aware that as it sits, the pasta will continue to absorb some of that delicious sauce, so it will be thicker when you pull it out. That’s totally normal, and we’ll fix it when we reheat.
Freezing Instructions
Yes, you can freeze this, but be mindful of the texture. Dairy-based sauces can sometimes separate slightly after thawing. For best results, store the cooled pasta in a freezer-safe, airtight container. It will keep for up to 3 months. Thaw it overnight in the refrigerator before reheating. Don’t try to reheat it straight from the freezer.
The Best Way to Reheat
I’m going to be firm on this: do not use the microwave. The high, uneven heat of a microwave is the fastest way to ruin this dish. It will obliterate the delicate emulsion we created, causing the dairy in the sauce to break and turn into a greasy, separated mess. The pasta will also become tough and rubbery. Just don’t do it.
Here’s the only method I recommend:
- Use a Skillet: Place your leftover pasta in a skillet or saucepan over low heat.
- Rehydrate the Sauce: Add a splash of whole milk or chicken broth (about 1-2 tablespoons per serving).
- Stir Gently: Stir the pasta and liquid together gently and consistently as it warms up. The added liquid will loosen the thickened sauce, helping it return to its original creamy, luscious consistency without breaking. Heat just until it’s warmed through. This method gently brings the sauce back to life and keeps the pasta tender.
This pasta is definitely the star of the show, but the right supporting cast can turn a delicious dinner into an unforgettable meal. My philosophy is all about balance. Because the pasta is so rich, creamy, and spicy, you want sides that are cool, crisp, and bright to cut through that richness and refresh your palate.
And hey, if you’re building a whole menu of incredible spicy pasta dishes, my Chili’s Cajun Chicken Pasta Copycat is another absolute must-try! But for this Buffalo Chicken Pasta, these are my three go-to pairings.
What to Serve With This Dish
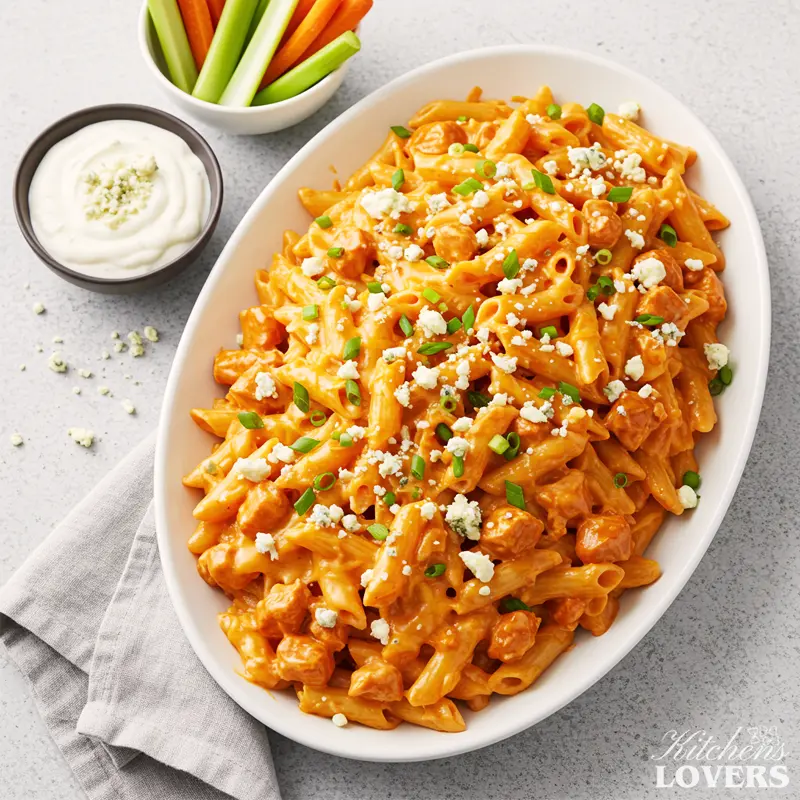
Classic Celery & Carrot Sticks with Dip
There’s a reason wings are always served with celery—it just works. That cool, crisp, audible crunch provides the perfect textural contrast to the soft pasta and creamy sauce. The fresh, slightly vegetal flavor cuts right through the richness of the cheese and butter, preventing the dish from feeling too heavy and acting as a palate cleanser between bites. Serve a pile of chilled celery and carrot sticks alongside a bowl of extra blue cheese or ranch dressing for dipping. It’s classic, simple, and perfect.
A Zesty Green Salad with Lemon Vinaigrette
You don’t want a complicated salad that competes for attention; you need a simple, bright counterpoint. The acidity in a sharp vinaigrette is your best friend here, as it balances the fat in the cream sauce and cleanses your palate, making each new bite of pasta taste just as good as the first. A bowl of mixed greens with some sliced cucumber and cherry tomatoes is all you need. Just be sure to skip the creamy dressings and go for a zesty lemon vinaigrette.
Crusty Garlic Bread (For Mopping!)
While this dish is rich, you’ll find yourself wanting something to make sure not a single drop of that incredible sauce goes to waste. This is less about contrasting flavor and more about pure utility and texture. A super-cheesy, heavy garlic bread would be overkill, but a lightly toasted, crusty slice of a baguette with a swipe of garlic butter provides the perfect crunchy vehicle for scooping up any leftover sauce in your bowl. It’s all about making the most of every last, delicious bite.
I love getting questions. It shows you’re engaged and thinking about how to make this recipe your own. Here are answers to a few things that might be on your mind. My goal is for you to walk into your kitchen with total confidence.
Frequently Asked Questions (FAQs)
Spice & Make-Ahead Tips
Absolutely. The recipe is written for a classic medium heat level that most people love. For a milder sauce that still has all that great tangy flavor, use just ½ cup of the Buffalo hot sauce. If you’re a true heat-seeker, use the full ⅔ cup and even add a pinch of cayenne pepper when you toast the flour for an extra kick of heat.
Yes, and the Pasta Bake variation from Part 7 is your best option here. You can fully prepare the skillet recipe and assemble the casserole in your 9×13 dish, then cover it tightly and refrigerate it for up to 24 hours. When ready to serve, just bake it straight from the fridge, adding about 10-15 minutes to the baking time to ensure it’s hot and bubbly all the way through.
Chicken & Recipe Variations
Yes, this is a brilliant shortcut and one I use all the time on busy nights! You can skip the initial chicken-searing step entirely. Just stir about 2-3 cups of shredded rotisserie or other leftover cooked chicken into the finished sauce at the very end along with the cooked pasta, and let it heat through for a couple of minutes.
That’s a great question! While both are the ultimate comfort food, this recipe creates a true pasta dish with a silky, velvety sauce designed to perfectly coat the noodles. My Buffalo Chicken Mac and Cheese, on the other hand, is a much richer, gooier, baked casserole with a classic, extra-thick cheese sauce as its foundation. Think of this recipe as the perfect skillet dinner and that one as its decadent, baked cousin.
Your Turn! Let’s Hear From You
And there you have it—your complete playbook for the ultimate Buffalo Chicken Pasta. This is more than a recipe; it’s a reliable system for creating a dish I know your family will love, no matter which version you choose.
Now it’s your turn. I’d love to know what you think! Which of the methods did you try—the speedy skillet dinner, the cheesy bake, the set-and-forget crockpot version, or the potluck pasta salad? Leave a comment and a star rating below to let me know how it turned out. Your feedback helps everyone!
If you loved the spicy, creamy flavors in this dish, I have a whole collection of Spicy pasta recipes for you to explore next. And for a truly mind-blowing, Nashville-style take on spicy chicken pasta, my Nashville Hot Chicken Mac and Cheese is an absolute must-try.
Want more tested, foolproof recipes like this one sent straight to your inbox? Sign up for my free newsletter! You’ll get my latest and greatest creations, plus exclusive tips and tricks you won’t find anywhere else.
About Your Recipe Developer, Kate Thompson
Kate Thompson is a Le Cordon Bleu-trained chef with over 30 years of experience in professional restaurant kitchens and recipe development. She is the founder of a portfolio of high-authority food blogs and has dedicated her career to reverse-engineering complex dishes into foolproof recipes for the home cook. Kate believes that with the right techniques, anyone can create restaurant-quality meals, and she’s passionate about sharing the ‘why’ behind the ‘how’ to help you become a more confident and creative cook.
The Science of the Sauce (Why It Will Never Break)
Have you ever tried to make a creamy sauce at home and ended up with a sad, broken mess? A greasy puddle of orange oil sitting on top of a thin, watery base? There’s a scientific reason for that, and once you understand it, you’ll never have a broken Buffalo sauce again.
The Problem: Fat vs. Water
At its core, a Buffalo sauce involves mixing two things that fundamentally hate each other: fat (from butter and cheese) and a water/vinegar-based liquid (your hot sauce and chicken broth). Without a mediator, no matter how hard you whisk them, the fat will always separate and pool on the surface. Heating this unstable mixture only makes the problem worse, causing it to “break” faster into a greasy mess. This is why just melting hot sauce, butter, and some cheese together is a recipe for disaster.
The Solution: A Little Food Science Magic
The secret to a stable, perfectly creamy sauce is creating an emulsion. An emulsion is simply a mixture where one liquid is suspended in another, even though they normally wouldn’t mix. Mayonnaise is a perfect example (oil suspended in egg yolk and vinegar). To make this happen, you need an emulsifier. If you want to see this concept in action, the team at Serious Eats has a great video breakdown of culinary emulsions that shows how the science works in the kitchen.
To create a strong emulsion, you need an emulsifier. An emulsifier is a special molecule that acts as a peacemaker. One end of it loves water, and the other end loves fat. It grabs onto both the oil and water droplets, forcing them to co-exist peacefully in a stable, creamy union.
The Hero: Your Full-Fat Cream Cheese
This is why full-fat cream cheese is the non-negotiable superstar of this recipe. It is one of the best and easiest emulsifiers for a home cook. It’s packed with fat and milk proteins (specifically casein) that excel at grabbing both the fat and the water in our sauce and holding them together. When you whisk it into the broth over low heat, you’re not just melting it—you’re activating its emulsifying powers, creating a strong, stable foundation. When you melt the cheddar cheese into that foundation, the emulsion is strong enough to hold onto the new fat, resulting in a sauce that’s glossy, smooth, and will not break.
Low-fat cream cheese, on the other hand, has a higher water content and not enough fat to act as a powerful emulsifier. Under heat, it simply lets go, releasing any fat and causing the sauce to curdle and separate. This is the science behind our guaranteed success. And that, right there, is the guarantee behind your perfect Buffalo Chicken Pasta.
This recipe was last tested and updated in September 2025 to ensure perfect results.
The Ultimate Buffalo Chicken Pasta (3 Ways: Skillet, Bake, or Crockpot!)
Equipment
- Large 12-inch Skillet or 5-quart Dutch Oven
- Box Grater
- Sturdy Whisk
Ingredients
Pasta & Chicken
- 1 lb short pasta like Cellentani, Cavatappi, or Penne
- 1.5 lbs boneless skinless chicken breasts or thighs, cut into 1-inch cubes
- 4 tablespoons unsalted butter
- 1 tablespoon olive oil
- 1 medium yellow onion finely chopped
- 4 cloves garlic minced
- 2 tablespoons all-purpose flour
- 1.5 cups low-sodium chicken broth
- 1/2 to 2/3 cup Buffalo hot sauce like Frank’s RedHot Original
- 8 oz full-fat block cream cheese softened and cubed
- 2 cups sharp cheddar cheese freshly shredded
For Serving (Optional)
- Crumbled Blue Cheese or a drizzle of Ranch/Blue Cheese Dressing
- Thinly Sliced Green Onions or Fresh Chives
Instructions
- Cook the Pasta & Prep the Chicken: Get a large pot of water boiling for your pasta. Once it’s at a rolling boil, salt it generously. Add the pasta and cook for 2 minutes less than the package directions for al dente. Just before you drain it, scoop out and save at least one cup of the starchy pasta water. While the pasta cooks, pat your chicken cubes dry and season them well with salt and pepper.
- Sear the Chicken & Build the Flavor Base: Place your large skillet or Dutch oven over medium-high heat and add the olive oil and 2 tablespoons of the butter. When the butter is melted and foaming, add the chicken in a single layer (work in batches if needed). Sear for 2-3 minutes per side until golden-brown. Remove the chicken to a clean plate. Reduce heat to medium, add the remaining 2 tablespoons of butter. Add the chopped onion and sauté for 5-7 minutes until soft. Add the minced garlic and stir constantly for 30-60 seconds until fragrant.
- Create the Velvety Buffalo Sauce: Sprinkle the flour over the onions and garlic and cook for one minute, whisking constantly. Slowly pour in the chicken broth while whisking, scraping up any browned bits. Whisk in the Buffalo hot sauce and bring to a simmer. Immediately reduce the heat to low. Add the cubed cream cheese, whisking until completely melted. Add the shredded cheddar cheese one handful at a time, stirring until melted before adding the next. Keep the heat low.
- Combine and Finish the Dish: Return the seared chicken and any juices back into the skillet. Add the drained, undercooked pasta. Stir everything together and let it simmer over low heat for another 2-3 minutes, until the chicken is cooked through and the pasta is perfectly al dente. If the sauce is too thick, stir in a splash of reserved pasta water. Serve immediately, garnished as desired.
Notes
- For the Sauce: Your success hinges on using full-fat, block-style cream cheese. This is the key emulsifier. Add all dairy over low heat and never let it boil to prevent the sauce from breaking.
- Pasta Texture: Cook the pasta for 2 minutes less than the package instructions for al dente. It will finish cooking to perfection in the sauce, absorbing flavor without turning mushy.
- Shred Your Own Cheese: Avoid pre-shredded, bagged cheese. The additives create a grainy texture. Freshly shredding your block of cheddar is non-negotiable for a silky-smooth sauce.
- Reheating: Never use the microwave. The best way to reheat leftovers is gently in a skillet over low heat with a splash of milk or chicken broth to restore the sauce’s original creamy consistency.
