
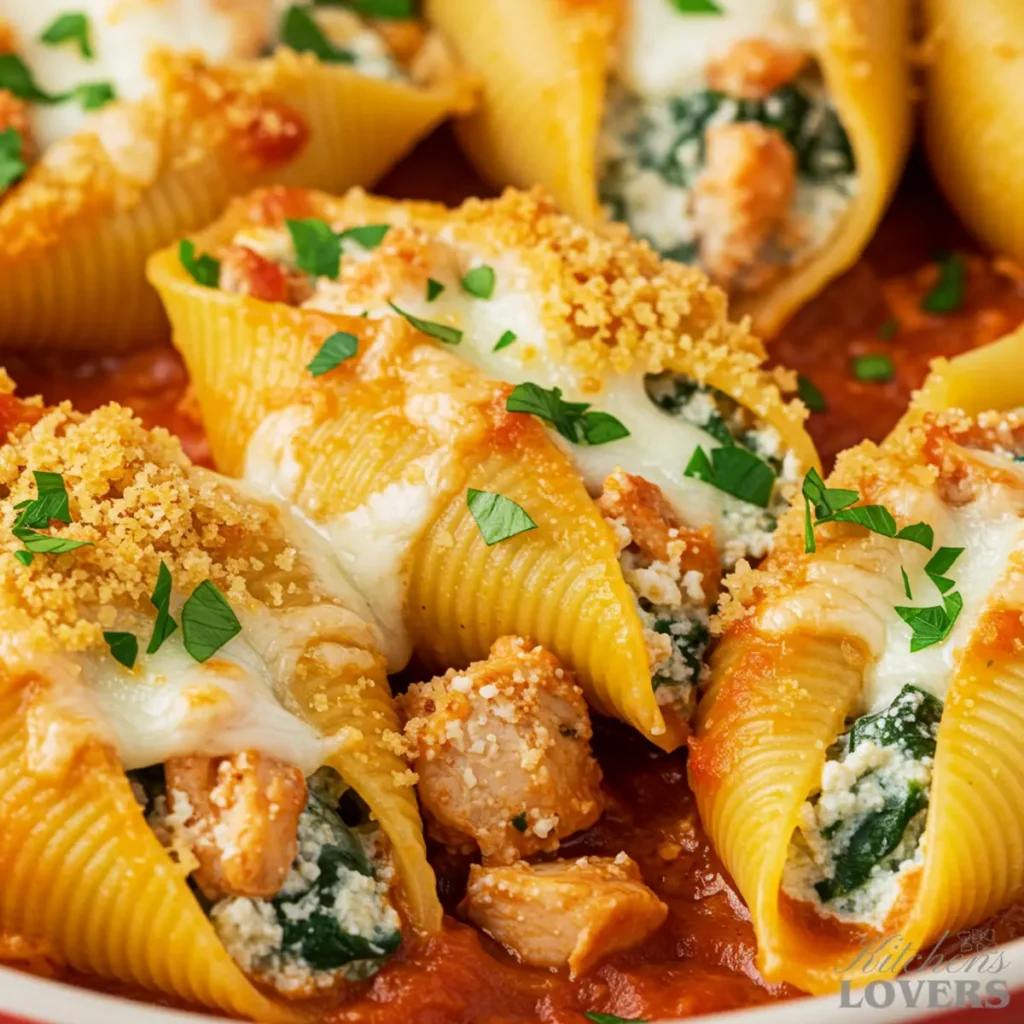
For years, my oldest son would only request one thing for his birthday dinner: a giant, bubbling casserole dish of cheesy stuffed shells. It’s the ultimate comfort food hug, right? But for the longest time, I was secretly frustrated. Why did my ricotta filling—the very heart of the dish—sometimes turn out… well, sad? Some batches were perfectly creamy, while others were watery and gritty, turning my masterpiece into a bit of a mess.
I’ve spent years in my kitchen perfecting the solution, and I’m sharing it with you today. Forget everything you think you know about stuffed shells. The secret isn’t in a fancy ingredient or a complicated sauce. The secret is in the technique. I’m going to teach you the one simple, game-changing step that guarantees a luxuriously creamy, rich, and stable ricotta filling every single time. This is the recipe that will make you famous in your family.
Ready to cook the best stuffed shells of your life?
Why This Chicken and Ricotta Stuffed Shells Recipe Works
- The Ultimate Creamy Filling: My “Ricotta Rescue” method is a total game-changer. I’ll show you how to easily remove excess water from the ricotta, concentrating its flavor and ensuring a perfectly lush, creamy texture that never breaks.
- Flavor Layered at Every Step: We don’t just use boring, plain “cooked chicken.” We build a foundation of flavor by perfectly seasoning and pan-searing the chicken before it even meets the filling, making every bite that much more delicious.
- An Irresistible Crispy Topping: Forget a soggy, cheesy top. We’re adding a garlic-and-herb panko breadcrumb topping that gets incredibly golden and crunchy, adding a much-needed textural contrast to the creamy shells.
- Make-Ahead & Freezer Perfected: This recipe isn’t just delicious; it’s designed for your busy life. I’ll share my exact, tested instructions for prepping it ahead or freezing it for a future meal, so a comforting dinner is always ready to go.
The Building Blocks of a Perfect Casserole
Great ingredients are the foundation of any unforgettable meal. For this section, we’ll focus on our two ‘stars of the show.’ First, I’ll show you why whole milk ricotta is non-negotiable for that luxuriously creamy filling we all crave. Second, we’ll solve the problem of dry, boring chicken for good. I’ll share my top 3 methods for preparing perfectly tender, flavorful chicken—a detail other recipes ignore but one that makes all the difference.
- Jumbo Pasta Shells: You’ll need about 10 ounces (about 2/3 of a standard 16-ounce box). Don’t worry about being exact—we’ll have enough filling.
- Whole Milk Ricotta Cheese: This is non-negotiable for the creamiest texture. Part-skim works in a pinch, but whole milk is what delivers that luxurious, rich result we’re after. (24 ounces)
- Shredded Low-Moisture Mozzarella: The gooey, stretchy cheese pull you crave. Pre-shredded is fine, but shredding your own from a block avoids anti-caking agents and melts better. (2 cups, divided)
- Grated Parmesan Cheese: For that nutty, salty bite. Please, use the real stuff—not the powder in a green can! (1 cup, divided)
- Cooked, Diced Chicken: You’ll need 2 full cups. How you get there is up to you, but it makes a huge difference. (See my guide below).
- Frozen Chopped Spinach: One 10-ounce package. Thaw it completely and squeeze it bone dry. Squeezing out the water is just as important as draining the ricotta!
- Large Egg: The binder that holds our glorious filling together. (1)
- Garlic: Because no Italian-American classic is complete without it. (3 cloves, minced, divided)
- Favorite Jarred Marinara Sauce: Grab a good quality 24-ounce jar. We’re focusing our energy on the filling, so let’s make life easy here.
- For the Crunchy Topping:
- Panko Breadcrumbs: The secret to a truly crispy, golden top. (1/2 cup)
- Unsalted Butter: To toast the panko to perfection. (2 tablespoons)
- Italian Parsley: For a touch of fresh, peppery flavor. (2 tablespoons, chopped)
- Seasoning: Kosher salt and freshly cracked black pepper.
The Best Chicken for Stuffed Shells
That vague “cooked chicken” instruction in other recipes is a huge missed opportunity for flavor. You have options, and the one you choose can make a real difference.
The Weeknight Hero: Rotisserie Chicken
Why: This is the fastest, easiest path to dinner. The chicken is already seasoned and incredibly moist. It’s my go-to when I’m short on time.
How: Simply pull the meat from one small rotisserie chicken, discard the skin and bones, and dice it up. You’ll have the perfect amount.
The Tenderness Expert: Poached Chicken
Why: This is my personal favorite for this recipe. Poaching the chicken breast gently in seasoned water makes it impossible to overcook, guaranteeing supremely tender, juicy meat that shreds beautifully.
How: Place two boneless, skinless chicken breasts in a saucepan and cover with water or chicken broth. Add a pinch of salt and a bay leaf. Bring to a gentle simmer (never a boil!) and cook for 14-18 minutes, until cooked through. Rest for 10 minutes before dicing.
The Meal-Prep Pro: Baked Chicken
Why: Simple and hands-off, and you can bake extra for other meals during the week.
How: Rub two boneless, skinless chicken breasts with olive oil, salt, pepper, and a little garlic powder. Bake on a sheet pan at 400°F (200°C) for 20-25 minutes, until the internal temperature reaches 165°F (74°C). Let it rest before dicing.
Smart Swaps & Substitutions
| Ingredient | Smart Substitution | Why It Works |
| Whole Milk Ricotta | High-Quality Cottage Cheese (drained) | Offers a similar creamy tang, but you must drain it well to avoid a watery filling. |
| Mozzarella Cheese | Provolone or a Fontina blend | Both are fantastic melting cheeses and will give you that wonderful cheese pull. |
| Spinach | Chopped Kale or Swiss Chard | Both are hearty greens that hold up well to baking. Be sure to wilt and chop them first. |
| Marinara Sauce | Vodka Sauce or a creamy Alfredo Sauce | Either will completely change the flavor profile for a delicious twist. See my Variations section! |
Essential Equipment for a Flawless Casserole
You don’t need a chef’s kitchen to make these stuffed shells, but a few key tools will make the process dramatically smoother and cleaner. After making this dish hundreds of times, I can tell you these are the items that truly make a difference between a good result and a great one.
- 9×13-inch Baking Dish: The classic choice for a reason. A glass or ceramic casserole dish is perfect. It heats evenly and holds that warmth, keeping your shells bubbling hot all the way to the table.
- Large Pot & Skillet: You’ll need a big pot to boil the pasta shells without them sticking together and a sturdy skillet (I love my cast iron for this) to cook your chicken and garlic, creating that essential first layer of flavor.
- Fine-Mesh Sieve or Cheesecloth: This is a crucial tool for our “Ricotta Rescue” technique. You need one of these to properly drain the ricotta, which is the non-negotiable first step to getting that perfectly creamy, non-watery filling.
- The Secret Weapon: A Piping Bag (or Ziplock Bag!)
This is my most urgent recommendation. Please don’t try to stuff the delicate shells with a spoon. It’s slow and messy, and you’re far more likely to tear the pasta. Instead, use a large piping bag fitted with a wide, plain tip. If you don’t have one, just use a large gallon-sized Ziploc bag! Just fill the bag with the ricotta mixture, snip off one of the bottom corners to create a 1/2-inch opening, and you have a perfect, disposable piping bag. This simple trick turns a potentially frustrating task into a clean, fast, and surprisingly satisfying process. It’s the difference between a kitchen chore and feeling like a total pro.
My Expert Tips for Flawless Stuffed Shells
This is my favorite part—the “secrets” that separate a good-enough dinner from a truly incredible one. A good recipe provides the map, but expert technique is what makes the journey flawless. I’ve learned these non-negotiable details over years of making this dish, and mastering them guarantees you’ll nail this recipe on your very first try.
1. The Secret to Rich, Never-Watery Ricotta (You MUST Drain It!)
This is the single most important step in the entire recipe and the key to our “Ricotta Rescue.” Do not skip it. Whole milk ricotta contains a significant amount of whey, which is a watery liquid. If you mix it straight from the container, that whey will release during baking, creating a pooled, watery sauce and a filling that’s gritty instead of creamy. Trust me, you’ve got to get it out.
Here’s how—it’s incredibly simple:
- Set Up Your Draining Station: Place a fine-mesh sieve over a bowl. For even better results, line the sieve with a layer of cheesecloth or a couple of heavy-duty paper towels.
- Let Gravity Do the Work: Spoon the entire container of ricotta into the prepared sieve. Cover it loosely with plastic wrap and place it in the refrigerator for at least 30 minutes. An hour is even better, and if you have the time, letting it drain for 4-6 hours is my professional method for the ultimate rich texture.
- The Payoff: After draining, you’ll see a surprising amount of cloudy whey in the bowl underneath. Your ricotta in the sieve will be visibly thicker, denser, and far more concentrated in flavor. This is the perfect foundation for our filling.
2. How to Avoid Tearing Your Pasta Shells
There’s nothing more frustrating than ending up with a pile of ripped, unusable pasta shells. After years of practice, I’ve perfected a method to keep them intact.
- Slightly Undercook Them: Check the package directions for cooking al dente, and then subtract two minutes. The shells will finish cooking in the oven, and pulling them from the water when they are still firm and sturdy is the best way to ensure they can handle being stuffed.
- Never Dump Them: Don’t just dump the pot into a colander in the sink! This is how shells get crushed and broken. Instead, use a spider strainer or a large slotted spoon to gently lift the shells out of the boiling water.
- Give Them Space: Carefully arrange the cooked shells in a single layer on a lightly oiled baking sheet. This stops them from sticking to each other as they cool and makes them easy to grab when you’re ready to fill.
3. Squeeze That Spinach BONE DRY!
Just like the ricotta, frozen spinach is packed with water. It’s the second enemy of our creamy filling. A “damp” squeeze isn’t good enough; we need to be aggressive here.
- Thaw and Wring: Once your spinach is fully thawed, place the entire mound in the center of a clean, sturdy kitchen towel (one you don’t mind staining slightly). Gather the towel into a ball and, over the sink, twist and squeeze with all your might.
- Keep Squeezing: You will be absolutely shocked at how much green water comes out. When you think you’re done, give it one more good squeeze. The final result should be a tight, very compact ball of spinach. This ensures only pure spinach flavor makes it into the filling, not a drop of extra moisture.
Step-by-Step Instructions to Your Best Stuffed Shells
Let’s walk through this together. We’re going to build this casserole step-by-step, making sure each layer is perfect. Put on some music, and let’s get cooking.
Time Needed: 1h15minutes.
Step 1: Cook the Pasta & Prep Your Station
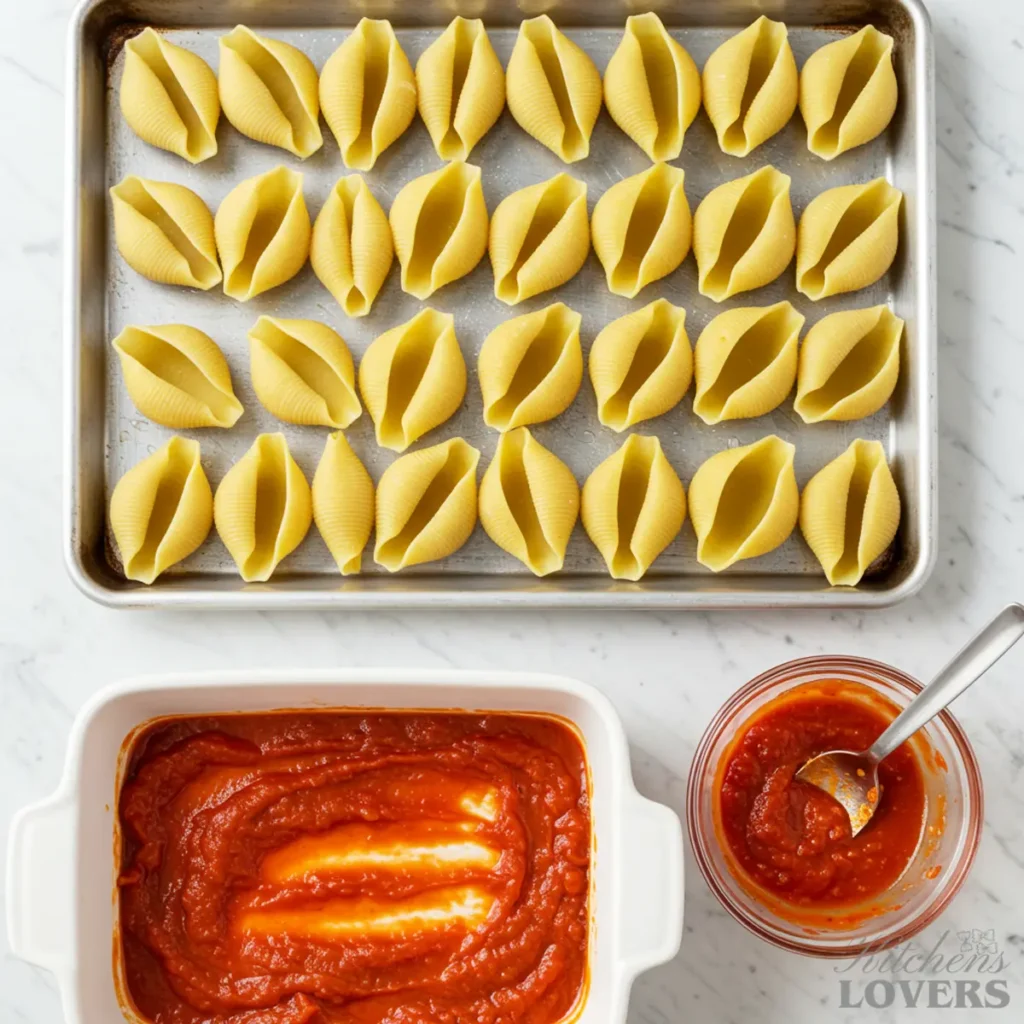
First, get your oven preheating to 375°F (190°C). Grab your 9×13-inch baking dish and pour about half of your jarred marinara sauce into the bottom, spreading it to cover the surface. This little bed of sauce prevents the shells from sticking and infuses them with flavor from the bottom up.
Now, bring a large pot of water to a rolling boil. Add a very generous pinch of salt—it should taste like the sea. This season it’s the pasta itself. Gently add the jumbo shells and cook according to the package directions, but remember our expert tip: pull them out about two minutes earlier than the recommended al dente time. They should be firm and hold their shape beautifully.
Use a slotted spoon to lift the shells from the water and arrange them in a single layer on an oiled baking sheet. Now they’re ready and waiting, perfectly intact.
Step 2: Toast the Crispy Panko Topping
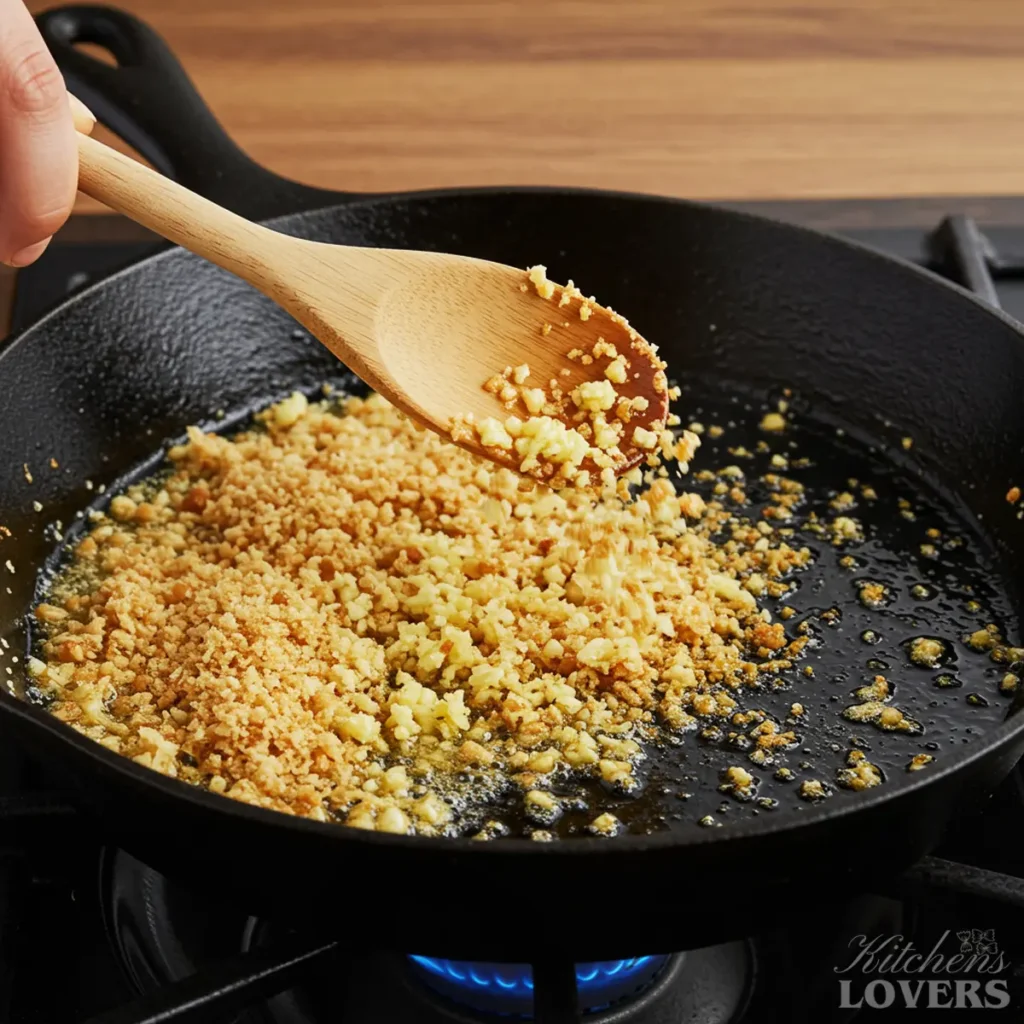
While the pasta cools slightly, let’s make the crunchy topping that will set your casserole apart. In a small skillet, melt the butter over medium heat until it’s foaming. Add the panko breadcrumbs and half of your minced garlic.
Stir it constantly for just a couple of minutes. You’re watching for the moment it turns a beautiful golden brown and that nutty, irresistible garlic aroma starts to fill your kitchen. It happens fast! Immediately remove the skillet from the heat, scrape the toasted panko into a small bowl, and stir in the fresh parsley. Set this aside—we’ll need it later for the final touch.
Step 3: Mix the Rich and Creamy Filling
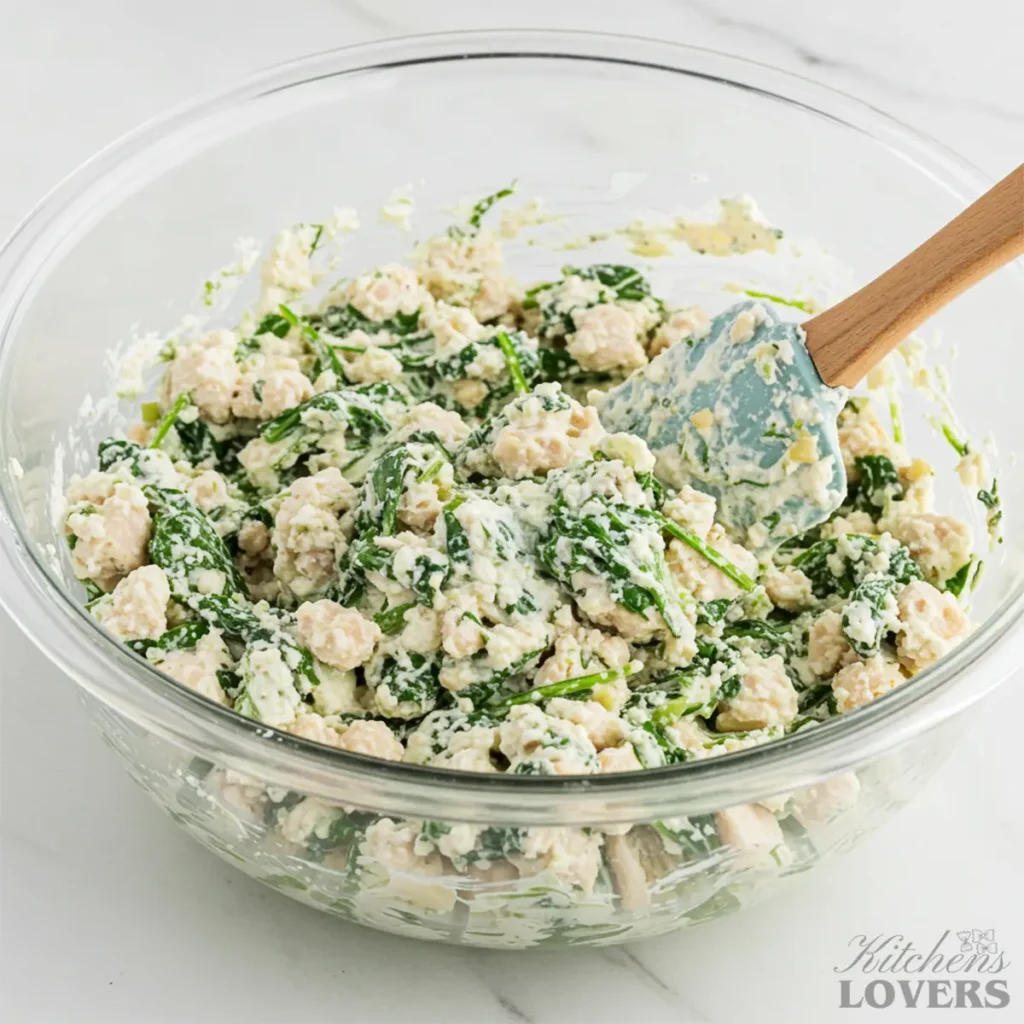
In a large bowl, combine your secret weapon—the drained, thickened ricotta—with the squeezed-dry spinach, your perfectly cooked diced chicken, 1 1/2 cups of the mozzarella, 3/4 cup of the Parmesan, the single egg, the rest of the minced garlic, a teaspoon of kosher salt, and about a half teaspoon of freshly cracked black pepper.
Mix it all together until it’s just combined. You’ll see right away that this filling is different. It’s thick, substantial, and not the least bit runny. This is the texture we’ve been working for!
Transfer the filling into your piping bag or your corner-snipped Ziploc bag.
Step 4: Stuff the Shells and Assemble
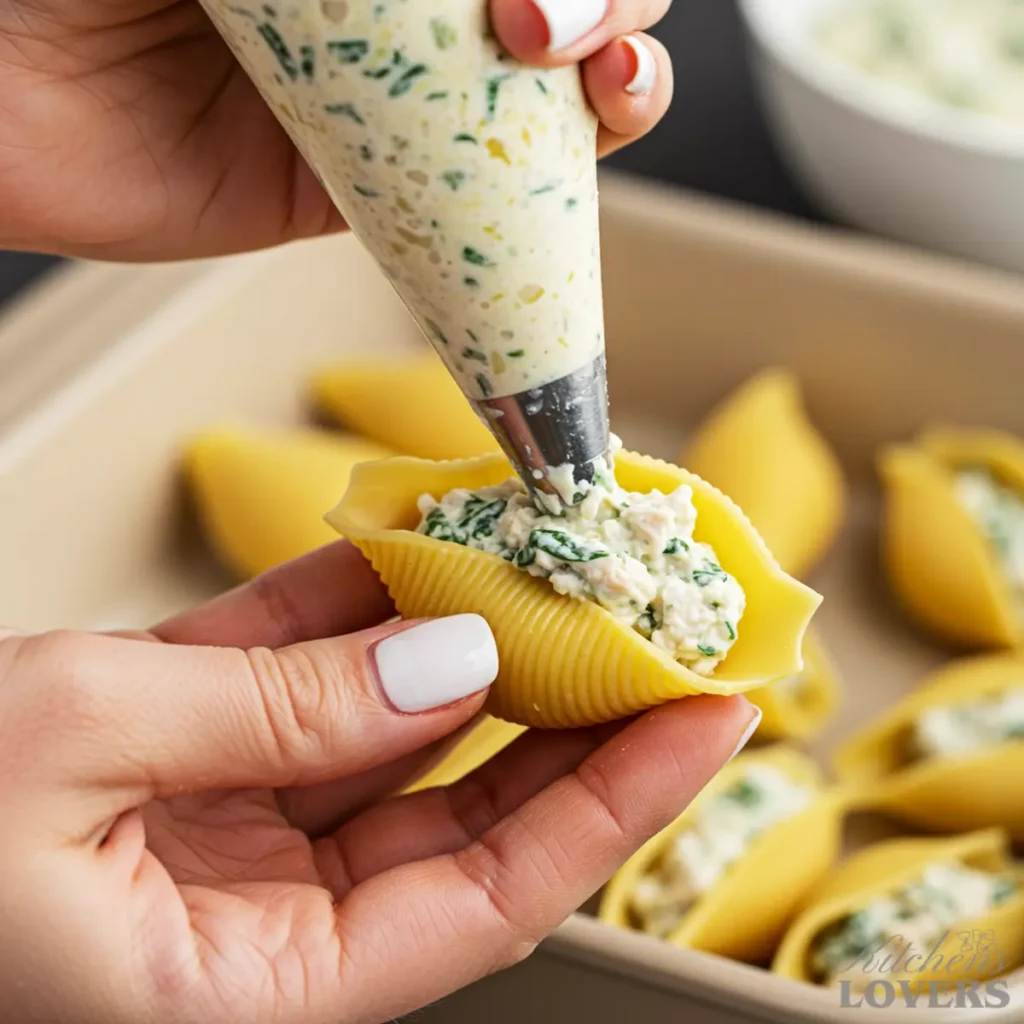
This is the fun part. Pick up a cooked shell and, with a gentle squeeze, pipe the ricotta-chicken mixture neatly inside until it’s generously filled. No mess, no torn pasta. Just place the filled shell, open-side up, into the prepared baking dish right on top of the sauce. Continue with the rest of the shells, nestling them snugly against each other until the dish is full.
Drizzle the remaining marinara sauce over the top of the filled shells. You don’t need to drown them, just a nice even coating.
Step 5: Bake to Golden, Bubbling Perfection
Sprinkle the remaining 1/2 cup of mozzarella and 1/4 cup of Parmesan over everything. Cover the baking dish tightly with aluminum foil.
Bake for 25 minutes. Covering the dish first allows the shells to steam and cook through, and the cheese gets perfectly melted and gooey without burning.
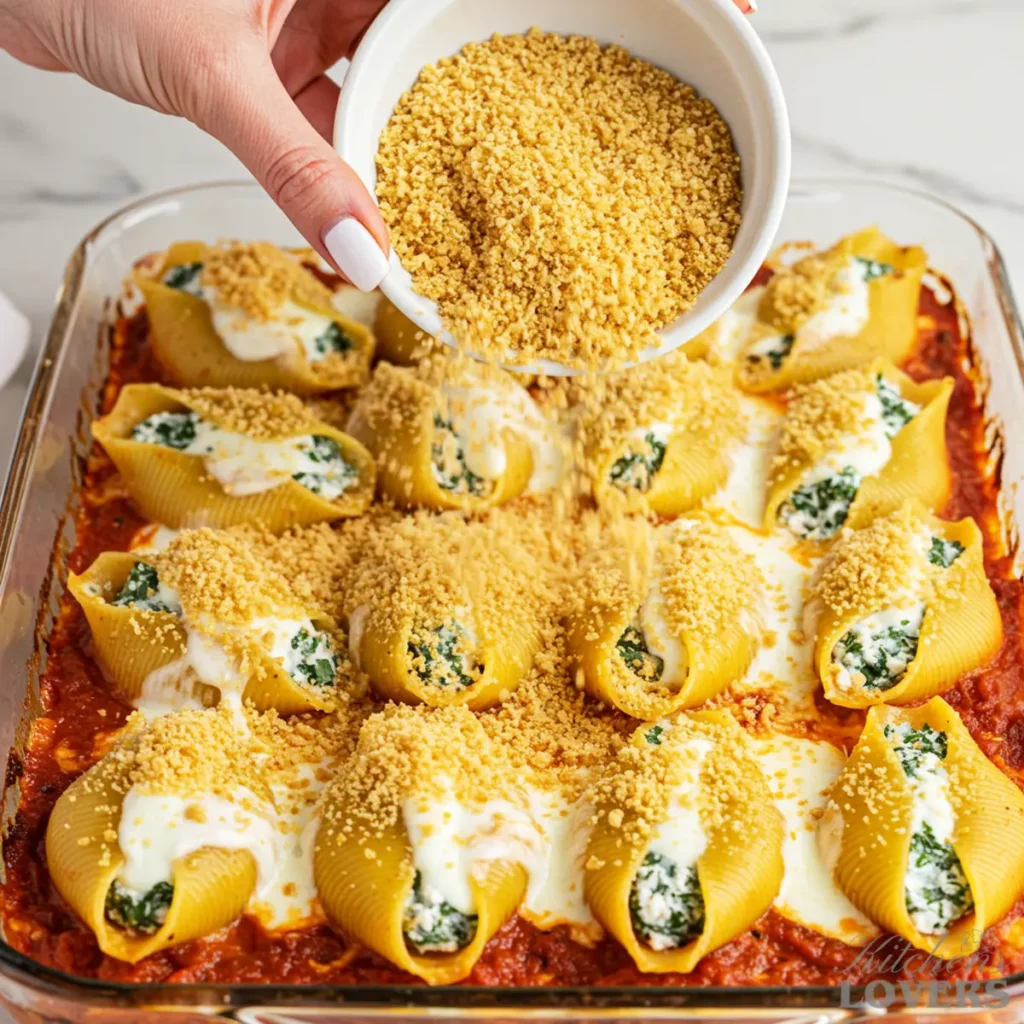
Now, carefully remove the foil. Sprinkle your glorious, golden panko topping evenly over the surface. Return the dish to the oven, uncovered, and bake for another 15 to 20 minutes. You’ll know it’s done when the sauce is bubbling energetically around the edges and the panko is a deep, gorgeous golden brown. Your entire house will smell like the coziest Italian-American restaurant.
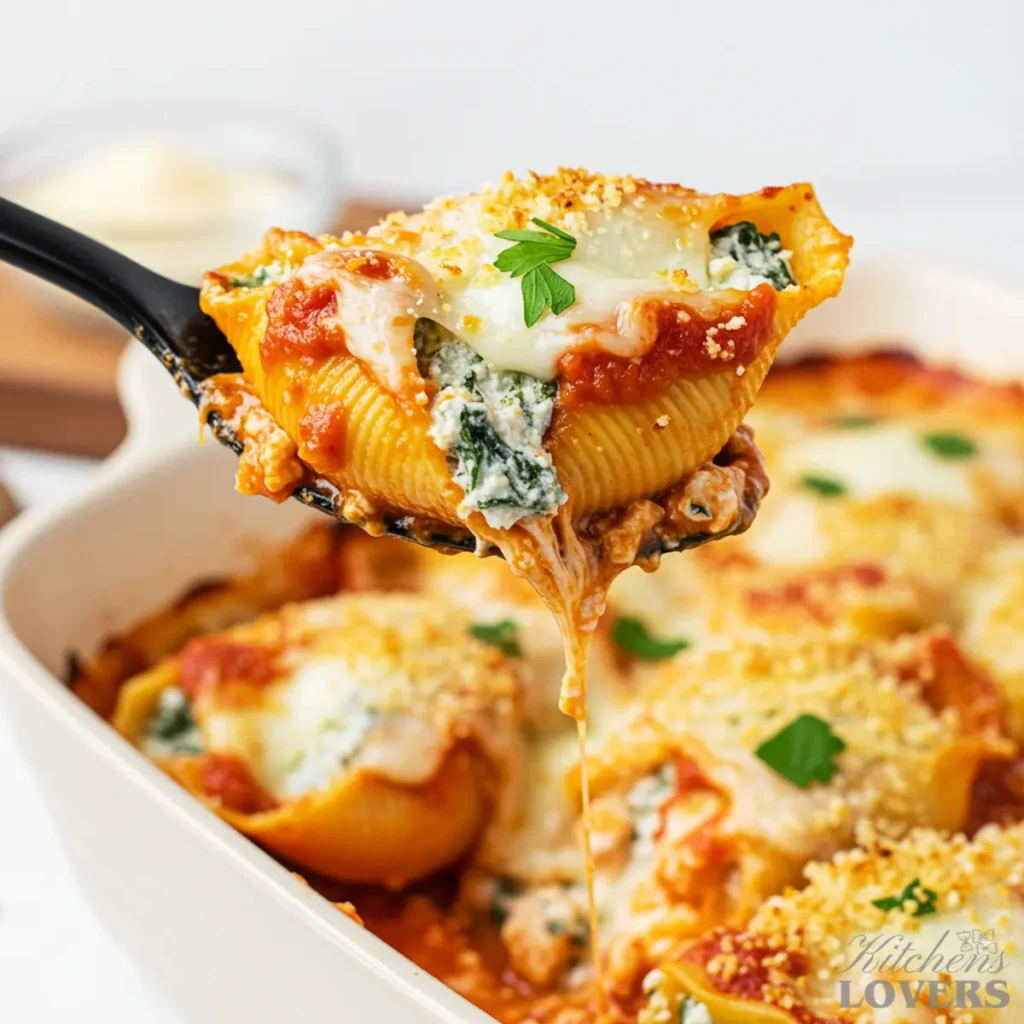
Let the casserole rest on a wire rack for at least 10 minutes before serving. This is crucial! It allows the filling and sauce to set up, so your shells don’t fall apart when you serve them. It’s hard to wait, I know, but it’s worth it.
Pro Variations to Make It Your Own
A truly great recipe isn’t a rigid set of rules; it’s a roadmap that invites you to take delicious detours. After years of making this dish for family and friends, I’ve developed a few foolproof variations that I come back to again and again. One is a complete solution for anyone who dislikes ricotta, and the other is a simple way to customize the crunchy topping that finishes the dish. Both are tested, beloved, and ready for your kitchen.
The “No-Ricotta” Stuffed Shells (For the Ricotta-Averse)
I get it—ricotta isn’t for everyone. Some find its texture or tang unappealing. But that shouldn’t stop you from enjoying a gorgeous pan of stuffed shells! This alternative filling is just as rich, creamy, and satisfying. It’s a direct swap.
The No-Ricotta Filling Ingredients:
- 16 ounces (2 blocks) full-fat cream cheese, softened to room temperature
- 1 ½ cups shredded low-moisture mozzarella cheese
- ½ cup grated Parmesan cheese
- 1 large egg
- Your 2 cups of cooked, diced chicken and 1 squeezed-dry package of spinach
- The same garlic and seasoning from the main recipe
Instructions: Simply combine the softened cream cheese, mozzarella, Parmesan, egg, chicken, spinach, and seasonings in a large bowl. Mix until well combined. The filling will be thick and creamy. From here, just proceed with Step 3 in the main recipe—fill your piping bag and stuff the shells exactly as described. The baking time remains the same. The result is a uniquely tangy, ultra-creamy filling that everyone will love.
How to Customize Your Crispy Panko Topping
The classic garlic-and-parsley panko topping in the main recipe is my forever favorite. It’s simple and perfect. But, depending on what I’m serving with the shells or who I’m serving them to, I sometimes like to give it a little twist. Here are two ways to level up your crunch:
- For a Spicy Citrus Kick: While you toast the panko and garlic in the butter, add a generous pinch of red pepper flakes and the zest of half a lemon. Toss it for the last 30 seconds of toasting. The brightness of the lemon zest and the gentle heat from the chili flakes are absolutely incredible against the rich, cheesy filling.
- For an Extra-Savory Parmesan Crunch: After you’ve toasted the panko and removed it from the heat, toss it with an additional 1/4 cup of finely grated Parmesan cheese and a pinch of smoked paprika. This addition makes the topping even richer, nuttier, and more deeply savory. It’s a cheese lover’s dream.
Storing, Freezing & Making Ahead (Your Ultimate Guide)
A truly great recipe shouldn’t just be delicious on day one; it should work for your real life. I’ve tested every possible method for this casserole to guarantee perfect results, focusing not just on flavor but on safety. All of my recommendations are built upon the core principles found in the USDA’s official guidelines for freezing and food safety. Think of this as my specific, foolproof playbook for this recipe.
How to Store Leftovers
If you’re lucky enough to have leftovers, let the casserole cool down slightly and then transfer the shells to an airtight container. They will keep beautifully in the refrigerator for up to 4 days.
The Refrigerator Make-Ahead Method (Assemble Today, Bake Tomorrow)
This is perfect for having dinner ready to go after a busy day.
- Assemble the entire dish in your 9×13-inch pan right up to the final step. Follow the instructions for cooking the pasta, making the filling, stuffing the shells, and topping with sauce and cheese.
- CRITICAL STEP: Do NOT add the panko breadcrumb topping. We’ll add that just before baking to ensure it stays perfectly crispy.
- Cover the dish tightly with foil and refrigerate for up to 48 hours.
- When you’re ready to bake, remove the dish from the fridge while the oven preheats to 375°F (190°C). Because you’re starting with a cold dish, it will need extra time. Bake covered with foil for 40-45 minutes, then remove the foil, add your freshly prepared panko topping, and bake for another 15-20 minutes until hot, bubbly, and golden.
The Ultimate Freezer Guide (My Foolproof Method)
Freezing stuffed shells is one of my favorite meal prep secrets. I prefer to freeze them unbaked, as it yields a fresher-tasting final result with a far better texture.
To Freeze an UNBAKED Casserole (The Best Way):
- Assemble the shells in a freezer-safe baking dish (disposable aluminum pans are fantastic for this) just as you would for the refrigerator make-ahead method: stuffed shells, sauce, and cheese topping. Again, do not add the panko.
- To prevent dreaded freezer burn, wrap it properly. I recommend a double layer. First, cover with plastic wrap, pressing it down gently so it touches the surface of the shells and cheese. Then, wrap the entire dish tightly with a layer of heavy-duty aluminum foil.
- My Pro-Tip: Prepare the panko topping as instructed and store it in a small freezer-safe Ziploc bag. Use tape to secure the bag right to the foil-wrapped dish. It’s your “baking kit,” and you won’t forget it!
- Label the dish with the date and recipe name, and freeze for up to 3 months.
To Bake from Frozen: There is no need to thaw! This is the beauty of it.
- Preheat your oven to 375°F (190°C).
- Remove the plastic wrap from the dish, but place the foil back on top.
- Bake covered for 60-75 minutes, or until the sauce begins to bubble around the edges.
- Remove the foil, sprinkle with the reserved panko topping, and bake for another 20 minutes until the shells are heated through and the topping is golden brown and delicious.
The Best Way to Reheat Leftovers
Please, whatever you do, avoid the microwave if you can. It makes the pasta rubbery and heats unevenly. The oven is your best friend for restoring these shells to their former glory.
The secret is creating steam so they don’t dry out.
Place your leftover shells in an oven-safe dish. Add a tablespoon or two of water or extra marinara sauce to the bottom of the dish. Cover tightly with foil and bake at 350°F (175°C) for about 20-25 minutes, or until heated through. They will taste almost as good as the day you made them.
What to Serve With Your Stuffed Shells
These shells are a hearty, satisfying meal all on their own, but the right side dish can turn a great dinner into an unforgettable one. The key is to choose companions that complement, rather than compete with, the rich and creamy star of the show. My go-to pairings are all about adding a touch of brightness, a different texture, or a simple freshness to balance the plate. Think of it as building a supporting cast for my entire collection of Crave-worthy chicken pasta.
1. The Ultimate Italian Chopped Salad
- Why it Works: This is the ultimate counterpart to a rich, cheesy casserole. It’s a festival of textures and flavors—crisp lettuce, salty olives, creamy chickpeas, and sharp provolone—all tied together with a tangy vinaigrette. That sharp dressing is the star, as it slices right through the richness of the shells and cleanses your palate, making every bite of the main dish feel fresh and new.
- How I Do It: I build my favorite version by tossing chopped romaine lettuce with chickpeas, diced provolone, sliced salami, thinly sliced red onion, and a few zesty pepperoncini peppers. The dressing is simple but perfect: a classic red wine vinaigrette made with good olive oil, red wine vinegar, a pinch of dried oregano, and salt and pepper.
2. Sautéed Green Beans with Toasted Almonds
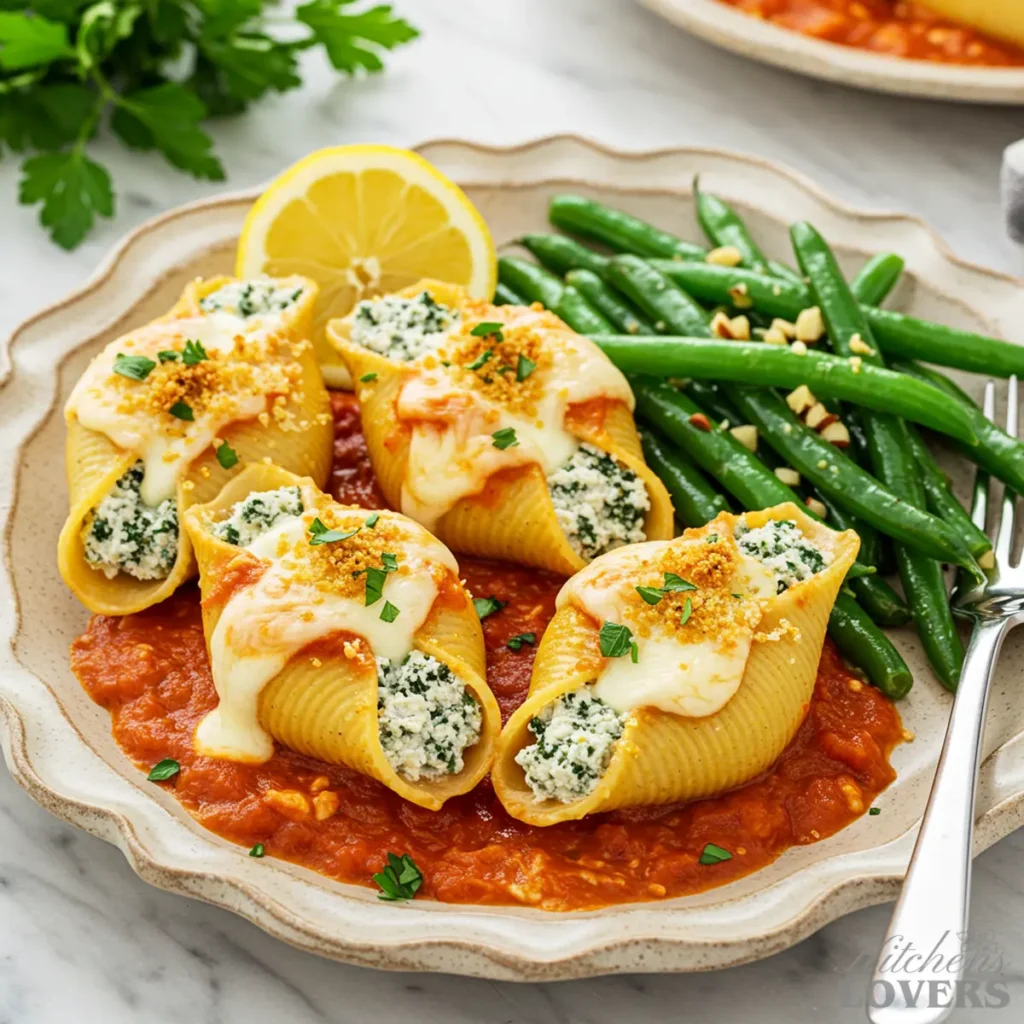
- Why it Works: This side brings a welcome pop of vibrant green and a satisfying snap to the table. It’s a study in elegant simplicity. The tender-crisp texture of the beans provides a beautiful contrast to the soft, yielding pasta, while the nutty, toasted almonds offer a flavor that beautifully complements the salty Parmesan in the shells.
- How I Do It: The trick to perfect green beans is to blanch them in boiling salted water for just 2-3 minutes, then shock them in ice water. This keeps them bright green and crisp. From there, I just give them a quick sauté in a hot pan with a little olive oil and garlic, then toss them with a handful of roughly chopped toasted almonds and a sprinkle of flaky sea salt before serving.
3. Rosemary and Sea Salt Focaccia
- Why It Works: Consider this the more sophisticated, aromatic cousin of garlic bread. Instead of being drenched in butter, its power comes from its pillowy interior and crisp, olive-oil-rich crust, topped with fragrant rosemary and crunchy sea salt. The herbal aroma is a classic Italian pairing that works beautifully with the tomato sauce, and its sturdy texture is absolutely perfect for mopping up every last bit of deliciousness from your plate.
- How I Do It: While you can certainly bake your own, a good-quality bakery focaccia is an excellent weeknight shortcut. I just warm the loaf in the oven for a few minutes before slicing and serving it alongside a small bowl of good olive oil for dipping.
Frequently Asked Questions
A great recipe should leave no room for guesswork. Over the years, I’ve gotten tons of questions about making stuffed shells, so I’ve gathered the most common ones here. My goal is to anticipate any hiccup you might face, so your path to a perfect casserole is smooth and confident. If you don’t see your question here, please ask it in the comments
Sauce & Veggie Variations
Absolutely! While classic marinara is my favorite pairing with the chicken and ricotta filling, this recipe is fantastic with other sauces. A rich, creamy Alfredo sauce turns it into an incredibly decadent, Northern Italy-inspired dish. For something in between, a rosé or vodka sauce is also a wonderful choice, offering both creamy texture and bright tomato flavor. Simply substitute your preferred sauce 1-for-1 with the marinara in the recipe—no other changes needed.
Yes, and that’s a fantastic way to customize the dish or use up produce you have on hand. Finely chopped sautéed mushrooms, well-drained roasted red peppers, or even finely chopped and steamed broccoli florets are all delicious additions. The most important rule is the same one we use for the spinach: you must make sure the vegetables are cooked and any excess water is squeezed or drained out completely before you add them to the ricotta filling. Extra water is the number one enemy of a creamy filling.
Common Problems & Shell Types
This is the most common problem people have with stuffed shells, and the answer is almost always one of two things: the ricotta or the spinach. If you skip my essential “Ricotta Rescue” step of draining the ricotta in a sieve for at least 30 minutes, all of its natural whey will release during baking, creating a watery pool in your dish. Likewise, if you don’t squeeze every last drop of moisture out of your thawed spinach, that water will seep into your filling. Taking the time to properly drain and dry these two ingredients is the absolute guarantee for a perfectly thick and creamy result every single time.
Yes, there’s a massive difference, and I would strongly advise against using medium shells for this recipe. Jumbo shells are specifically shaped and sized for stuffing—they have wide openings and sturdy walls that are designed to be filled and baked. Medium shells are much smaller and more delicate; they are meant to be simply tossed in a sauce like penne or ziti. Attempting to stuff medium shells will be incredibly frustrating, as they will most likely tear and won’t hold nearly enough of our delicious filling. Be sure the box says “Jumbo” or “Stuffing Shells.”
Let’s Connect! Your Feedback & More Dinners to Love
This recipe is one of my all-time favorites, and I’m so excited for you to make it for your family. There’s nothing better than putting a bubbly, golden, perfect casserole on the dinner table.

I’d love to know how your chicken and ricotta stuffed shells turned out! Did you try the panko topping? Did the ricotta-draining trick change the game for you? Please leave a star rating and a comment below to let me know!
If you loved the process of stuffing and baking this delicious pasta, you should absolutely try my Easy chicken manicotti recipe next. It features a similar satisfying method with a slightly different, but equally delicious, result. And if you’re craving these cozy chicken and cheese flavors but are short on time, my Creamy Tuscan chicken pasta delivers all that comfort in just one pan.
For more of my exclusive, kitchen-tested recipes designed to make you the hero of your dinner table, be sure to subscribe to the KitchensLovers newsletter!
About the Author
Kate Thompson created KitchensLovers.com to simplify dinner for real-life families. She develops easy, flavor-packed chicken pasta recipes tested dozens of times to guarantee results. Her motto: ‘Easy Pasta, Every Time.’
The Food Science Behind a Perfect Ricotta Filling
You’ve seen the incredible difference that draining your ricotta makes, but have you ever wondered why it works? It’s not just a kitchen hack; it’s food science in action. Understanding it is the key to mastering not just this recipe, but any that uses ricotta cheese. Let’s geek out for a minute.
What is Ricotta, and What is Whey?
Ricotta, which literally translates to “recooked,” is traditionally made from the whey left over from making other cheeses like mozzarella. Whey is the watery liquid, composed of about 93% water along with some lactose and proteins. Because of how it’s made, a container of ricotta cheese inherently holds a lot of this residual whey.
Think of that liquid you sometimes see sitting on top of a tub of yogurt or sour cream—that’s whey. When you mix undrained ricotta into your filling and put it in the hot oven, that whey has nowhere to go but out. It heats up, separates from the milk solids, and pools at the bottom of your casserole dish, creating that dreaded watery, soupy texture.
Why Draining Is a Game-Changer
When you drain your ricotta in a fine-mesh sieve or cheesecloth, you are using gravity to pull out that excess whey. So, what’s left behind?
The good stuff: concentrated milk solids.
These solids are primarily casein (a milk protein) and rich milk fat. By removing the water, you fundamentally change the filling’s composition. You concentrate the fats and proteins, which are responsible for flavor and that rich, creamy mouthfeel. A denser concentration of these solids creates a more stable filling that holds its shape beautifully during baking. It won’t break, weep, or become gritty.
So, when you perform that simple step of draining, you’re not just removing water. You’re scientifically engineering a richer, more flavorful, and structurally perfect filling for a flawless, never-watery result every single time.
This recipe was last tested and updated in August 2025 to ensure perfect results.
Chicken Ricotta Stuffed Shells Recipe
Equipment
- 9×13 inch Baking Dish
- Large Pot
- Skillet
- Fine-Mesh Sieve or Cheesecloth
- Piping Bag (or large Ziplock bag)
Ingredients
For the Shells & Filling
- 10 ounces Jumbo Pasta Shells about 2/3 of a 16-oz box
- 24 ounces Whole Milk Ricotta Cheese
- 2 cups Shredded Low-Moisture Mozzarella divided
- 1 cup Grated Parmesan Cheese divided
- 2 cups Cooked Chicken diced
- 10 ounces Frozen Chopped Spinach thawed and squeezed completely dry
- 1 Large Egg
- 3 cloves Garlic minced and divided
- 24 ounces Jarred Marinara Sauce
- 1 teaspoon Kosher Salt
- 1/2 teaspoon Black Pepper
For the Crispy Topping
- 1/2 cup Panko Breadcrumbs
- 2 tablespoons Unsalted Butter
- 2 tablespoons Fresh Italian Parsley chopped
Instructions
Prepare the Pasta and Topping
- Preheat oven to 375°F (190°C). Pour about half of the marinara sauce into the bottom of a 9×13-inch baking dish. Cook jumbo shells in generously salted water, undercooking by 2 minutes from the package instructions. Gently remove with a slotted spoon to a lightly oiled baking sheet.
- While pasta cools, melt butter in a small skillet over medium heat. Add panko and half of the minced garlic. Toast, stirring constantly, until golden brown, about 2-3 minutes. Remove from heat and transfer to a small bowl. Stir in the chopped parsley and set aside.
Mix the Filling & Assemble
- In a large bowl, combine the drained ricotta, squeezed spinach, cooked chicken, 1 1/2 cups mozzarella, 3/4 cup Parmesan, the egg, remaining garlic, 1 tsp salt, and 1/2 tsp pepper. Mix until just combined.
- Transfer the filling to a piping bag or a ziplock bag with the corner snipped off. Pipe the filling generously into each cooked shell. Arrange the filled shells snugly in the prepared baking dish.
Bake to Perfection
- Drizzle the remaining marinara sauce over the stuffed shells. Sprinkle with the remaining 1/2 cup mozzarella and 1/4 cup Parmesan. Cover the dish tightly with foil.
- Bake covered for 25 minutes. Remove the foil, then sprinkle the toasted panko breadcrumb topping evenly over the surface.
- Return to the oven and bake uncovered for another 15-20 minutes, until the sauce is bubbling and the topping is a deep golden brown. Let the casserole rest for at least 10 minutes before serving.
Notes
- The Secret to Rich, Never-Watery Ricotta: This is the most important step. Drain your whole milk ricotta in a fine-mesh sieve set over a bowl for at least 30 minutes (and up to a few hours) in the fridge. This removes the excess liquid whey, concentrating the milk solids for a perfectly thick and creamy filling.
- How to Avoid Tearing Pasta Shells: Cook shells for 2 minutes less than the package directs for ‘al dente.’ This keeps them firm. Never dump them in a colander; lift them from the water gently with a slotted spoon and arrange them in a single layer on an oiled baking sheet to cool.
- Squeeze That Spinach BONE DRY: After thawing the spinach, wrap it in a clean kitchen towel and squeeze over the sink with all your might until no more water comes out. This prevents it from making the filling watery.
